

How To Make Hair Bow Templates
Hello Daydreamers!
In today's tutorial, I am going to teach from start to stop how to make beautiful and stunning pilus bows with your Cricut machine.
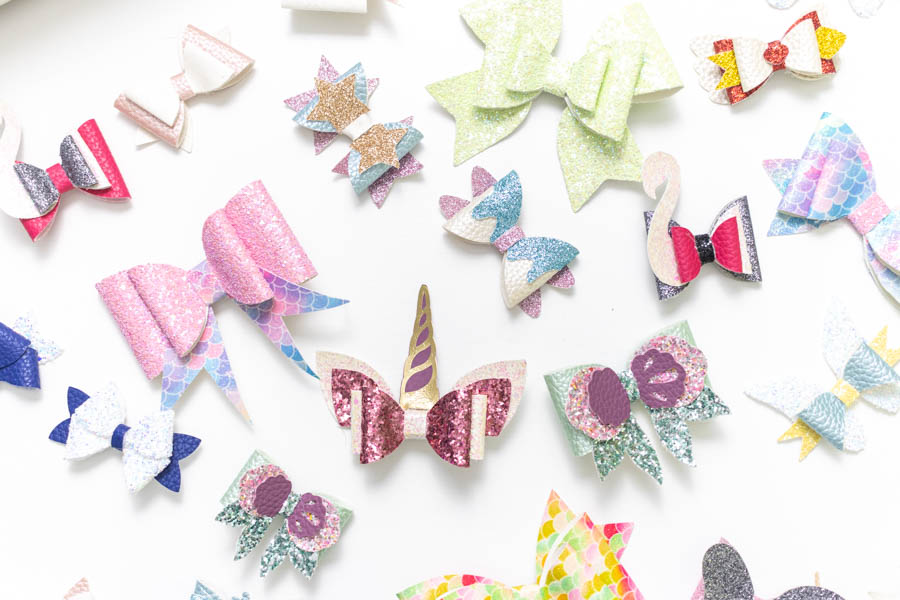
Non simply am I going to show yous how to make them, merely I will also provide you with eighteen gratuitous pilus bow templates all in this article!
Ideally, you will read this tutorial from the get-go because, as we go, we volition be implementing the concepts mentioned in the previews steps.
In a nutshell, these are the topics I am going to be covering in this tutorial.
- Materials yous demand to make bows
- Cricut Design Space steps
- Cutting and Assemble procedure
- Tips and other considerations when making bows
- 18+ Gratuitous SVG bow templates
- More pics of bows you tin can make with your Cricut.
Are you set?
Let's Daydream Into Reality!
Materials
Making bows with my Cricut, believe it or not, has been one of the nearly challenging projects I've made so far.
I mean, the steps are easy, but the multifariousness of materials you can find out there to make bows is unlimited and, sometimes, tough to cut.
Don't worry, though!
I need to start with this, and so yous trust my recommendations when doing this project.
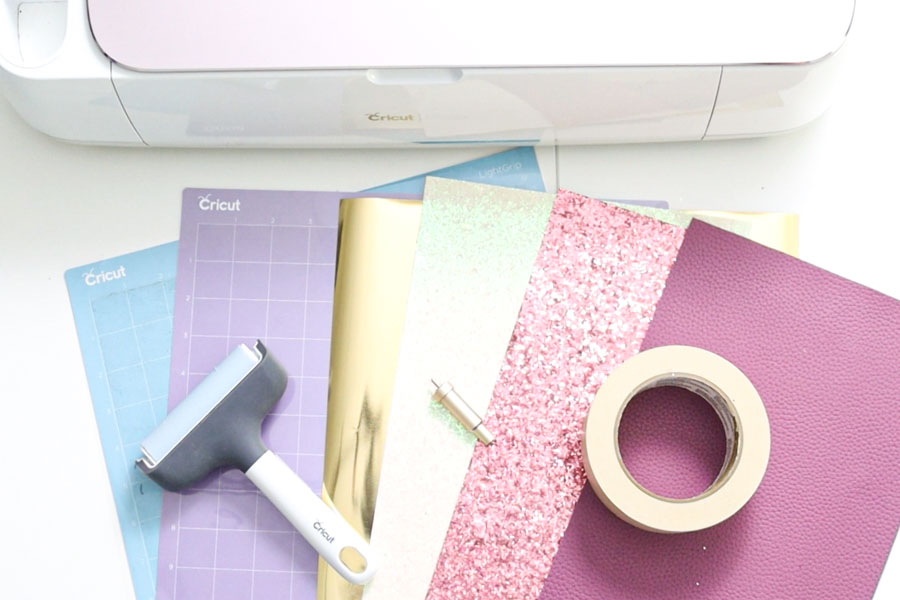
- Brand New StrongGrip Mat (purple)
- Fine Point Blade (sharp)
- Cricut Maker or Explorer
- Brayer
- Faux Leather
- Glitter Canvas (faux leather)
- Pilus Clips
- Atomic number 26-On
- LightGrip or StandardGrip Mat.
- Masking Tape
- Practice File (yellow download button)
The residue of the Costless files are in this article later on the Stride by Stride tutorial.
Notation: I merely used Iron-On on one bow because I wanted to bear witness you different possibilities.
To make these bows, I invested in a broad variety of materials from Amazon. There are and so many companies that accept so many options. Withal, I plant them to be a little deceiving.
The materials are beautiful!
But, every single glitter sheet that claimed to be "faux leather" was, in fact, canvas, or for very chunky glitter was some sort of textile.
It'south not a huge deal to me, but information technology does mean y'all need to test a lot!
Hither are some of the simulated leather and glitter canvas I bought.
- Mermaid Style
- Pastel Colors Glitter Sheets
- Mixed Faux leather and glitter canvas (beige colors)
- Mixed Imitation leather and glitter canvas (black and white colors)
- Chunky Glitter Canvas
- Variety Pack fine glitter Sail sheet.
All of these packs take a strong smell before you work with them, let them air out for a couple of days.
Make Hair Bows in Cricut Design Space
For this footstep by pace tutorial, I picked the "Unicorn File" because there'south a lot of details and opportunities for you to acquire.
Upload Bow
Download the file (in the materials section) the go to the canvas in Cricut Design Space, and click on the "Upload" button located on the left console.
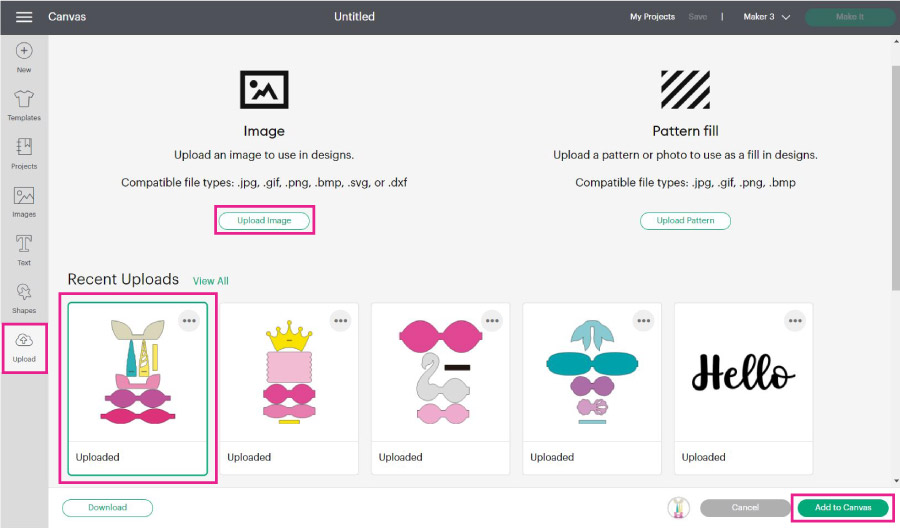
Follow the prompts to upload the bow, so select it from the "Recently uploaded images" and add it to the canvas.
Resize Bow Template
This is how the pilus bow looks when you upload it. There are multiple colors, and all of the pieces of the bow are grouped.
The first thing y'all need to do is resize your project.
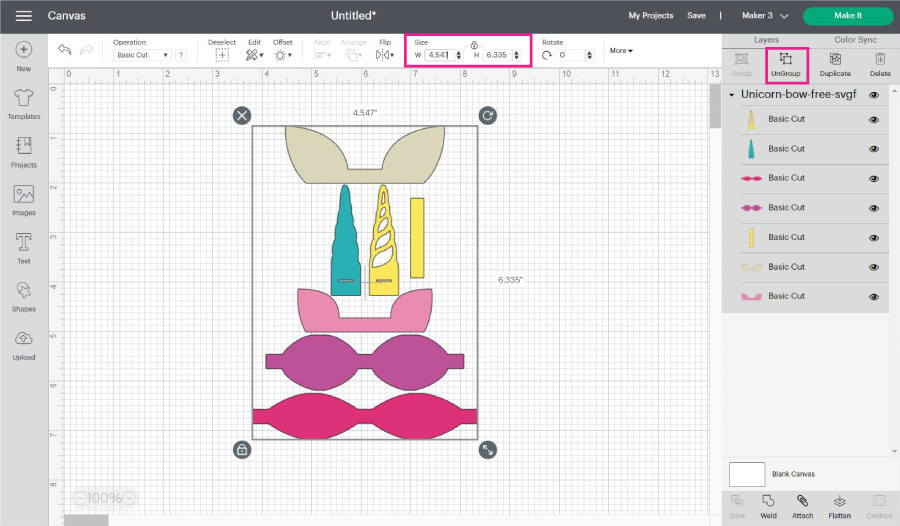
Brand certain y'all resize according to the largest piece. In this example, it is the 1 at the lesser.
Everything has to increase proportionally!
And so select all of the pieces that are part of the bow and type in the width you lot want.
In this case, I did a width of 6 inches.
Bows need to exist folded, and so the bodily size of this bow be cutting in half pretty much. The ears and the horn volition be bigger than the larger piece on the canvas.
I think 6 inches is an excellent size for pocket-size bows; they end up looking cute. However, you can likewise make them bigger.
Change Bow Colors
Later on resizing, ungroup the bow and modify the colors of your bow. If you were going to leave it as is, yous would need half dozen mats!
That's ok, simply I just wanted four different colors. All of these colors will represent different materials every bit well!
To change colors, select the layer, and click on the color box next to "Functioning."
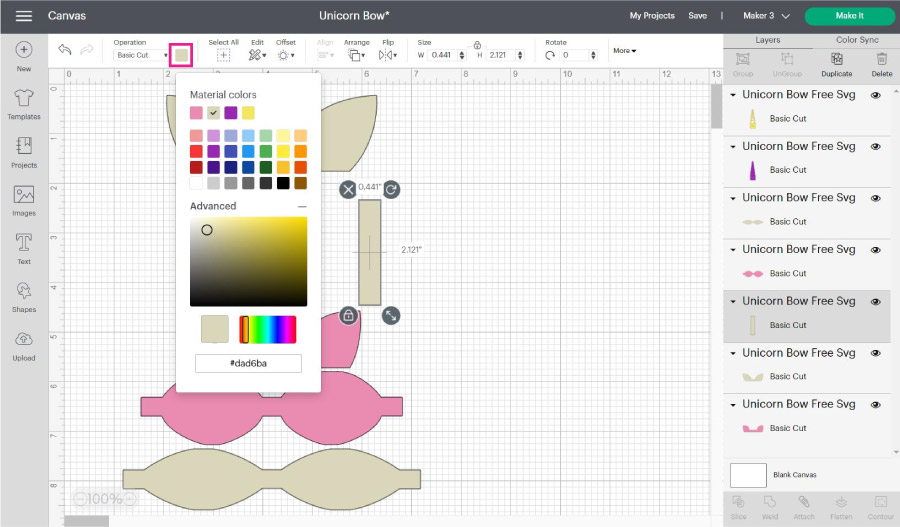
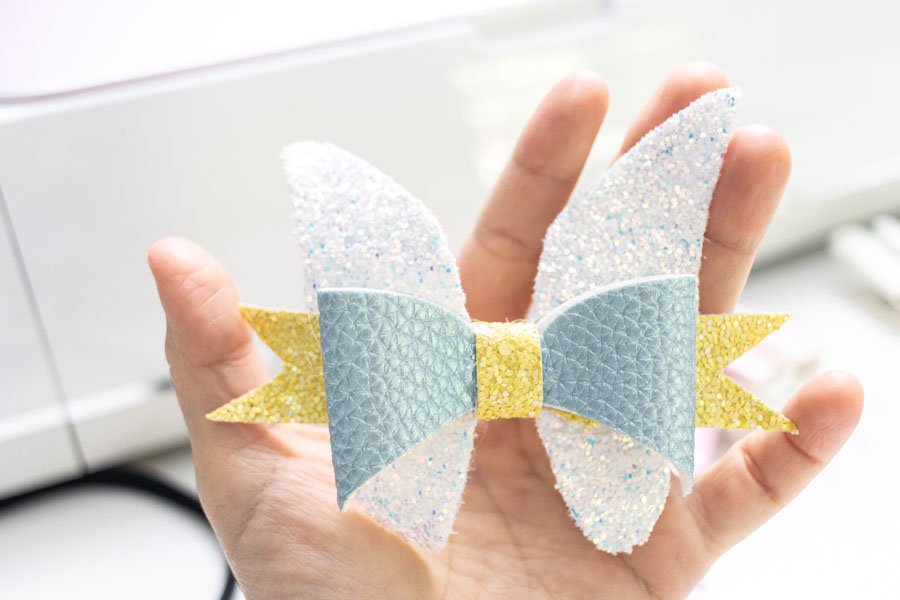
Here's how my bow looks like, and these are the materials I am going to utilize per color.
- Beige & Pinkish: Chunky glitter sheet
- Purple: imitation leather
- Yellow: atomic number 26-On
The reason why I am using iron-on on the horn is because of the small details. I don't recommend cutting visible intricate cuts on glitter canvas.
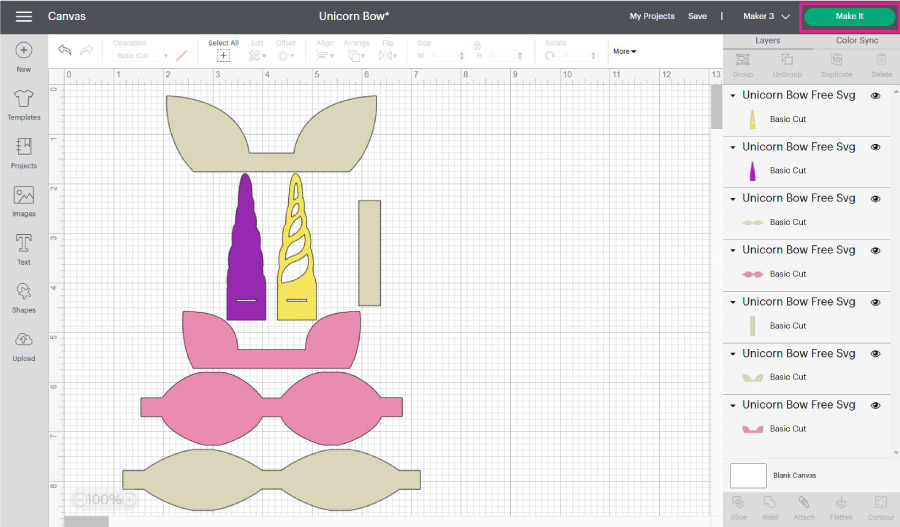
One time you're happy with the colors and size, click on the light-green "Make it" button.
Hair Bow Cutting Setting in Pattern Space
It's fourth dimension to check out the mats your project needs.
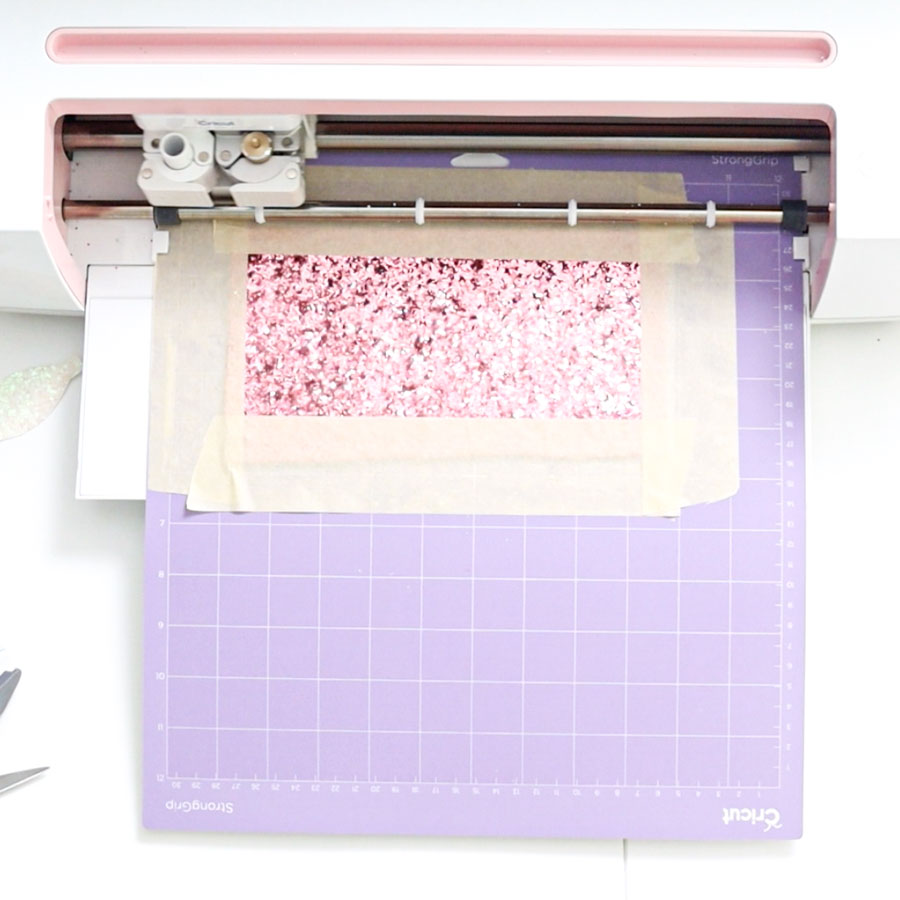
After trial and mistake (I fabricated more 100 cuts to bring this article to y'all), I found that the best practice when cutting glitter canvas is to motion all pieces leaving an entire inch on the left and one on the elevation.
Click on them and move them effectually. You also desire a functional space betwixt each space.
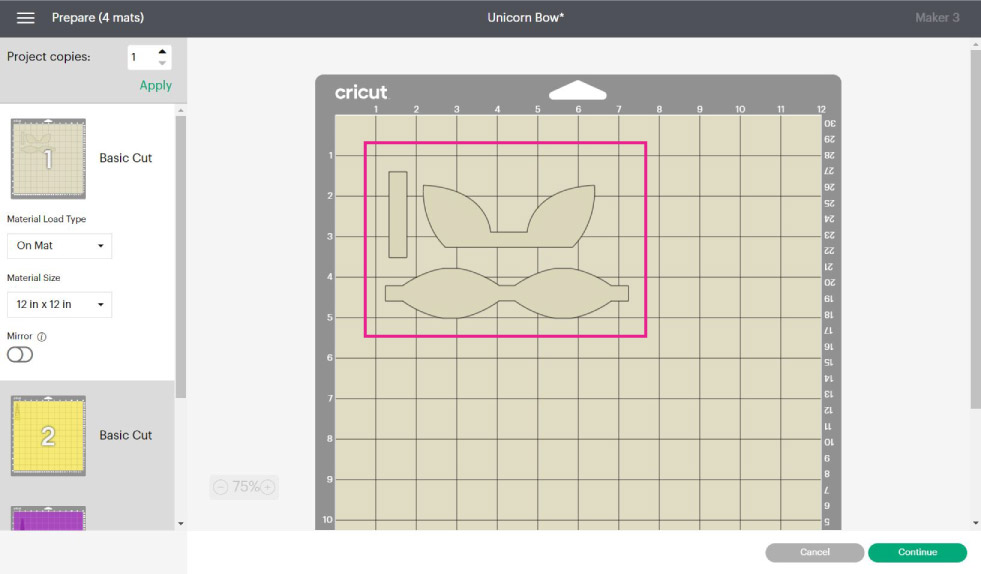
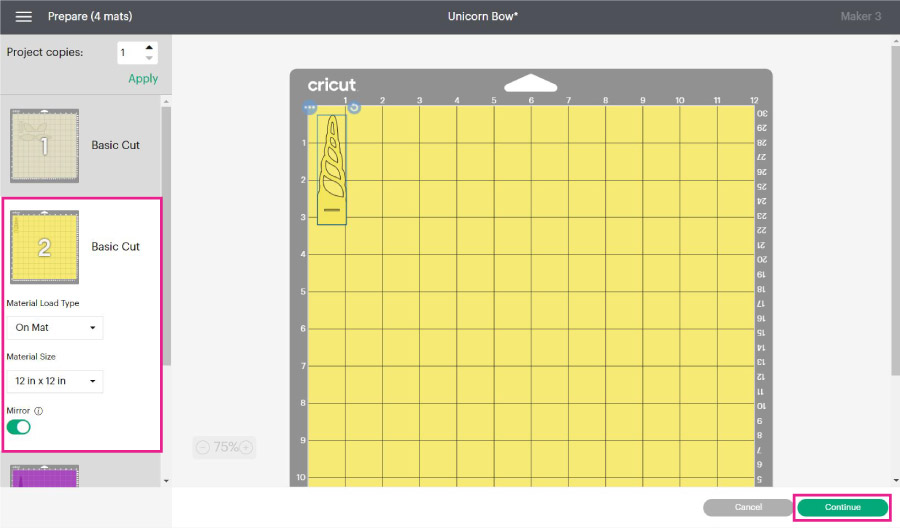
In that location are two mats where you need to mirror the paradigm if you are using imitation leather and iron-on because you will be placing them pretty-side downwards.
Once you cheque all of the mats, go ahead and click on continue to select the materials.
Cloth Settings for bows in Cricut Blueprint Space
Cutting glitter sheet and faux leather that yous buy online it's quite tricky. I tested multiple options to find the sweet spot.
Those materials don't exist in Cricut Design Space, then to brand bows, we need to create a new material.
It's quite easy!
On the "Set material" department, click on "Browse all materials."
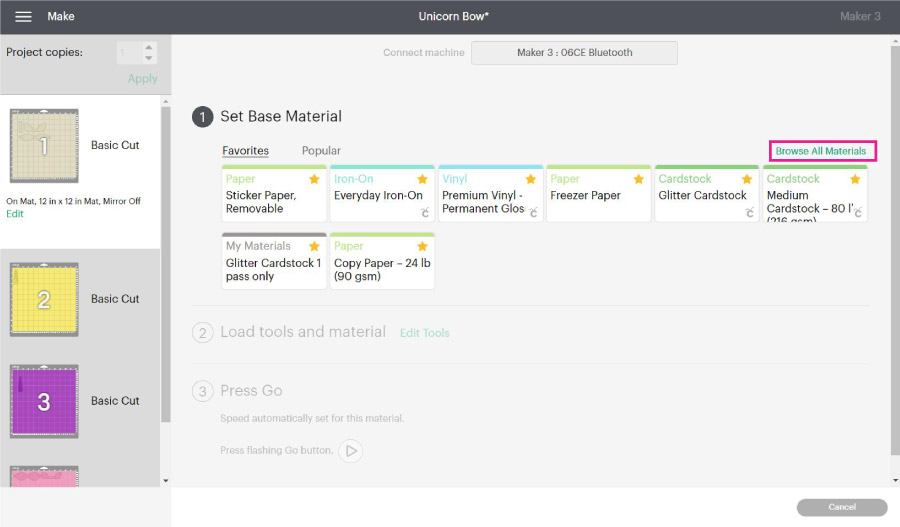
A new window will open with the most mutual materials.
Click on "Textile Settings" to add a new material.
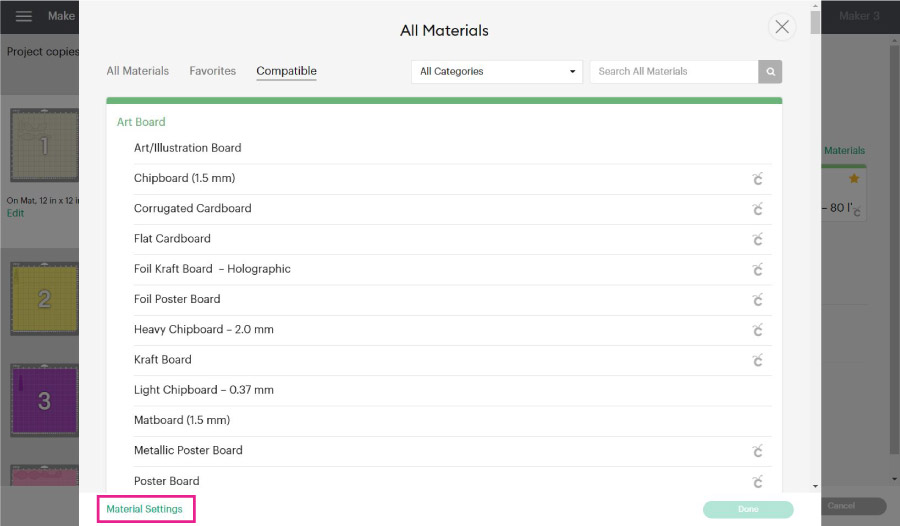
The data you'll meet is quite interesting!
Here you lot tin can see the verbal pressure and number of passes your Cricut will perform on each fabric.
To come up upwards with the settings I am most to show you, I looked at different materials and but played around with them.
Before we create the outset cloth, let's have a await at all the unlike materials we're going to employ for this bow.
As a reference, afine glitter canvass canvas can be cut when you select the choice"False Leather Paper Sparse" (an existing material in Blueprint Space) and motility the pressure to"more."
But, every bit we move in thickness, we need to conform the settings.
- Mesomorphic Glitter Canvas (less chunky): It's the typical glitter that is larger in size. The depth of the glitter is a bit more than fine glitter.
- Mesomorphic Glitter Canvas:Information technology's a combination of fine, chunky, less chunky, and actually really mesomorphic glitter, it has a lot of texture and difficult surfaces. Some of the super mesomorphic glitter sheets can't exist cut with the Cricut (Especially animate being printed ones).
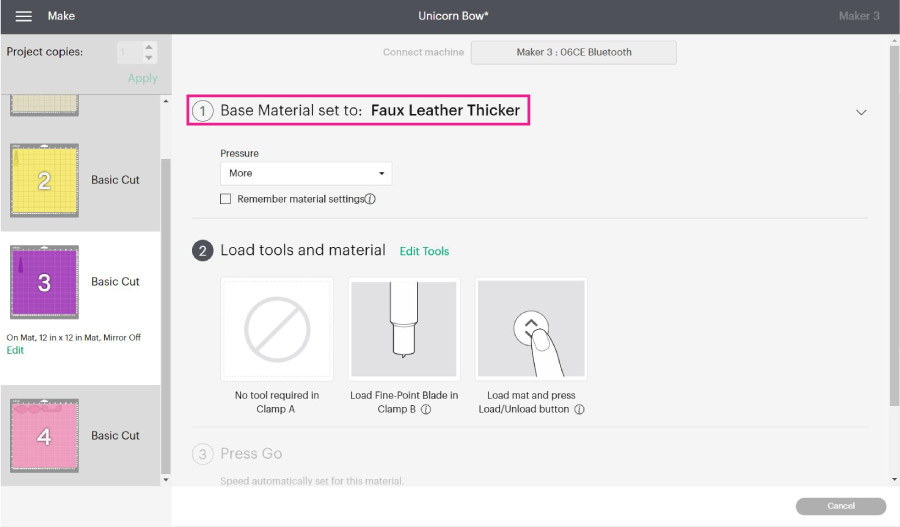
- Faux Leather Thicker:The choice in Design Space for paper-thin leather. Most sheets I bough were thicker than paper.
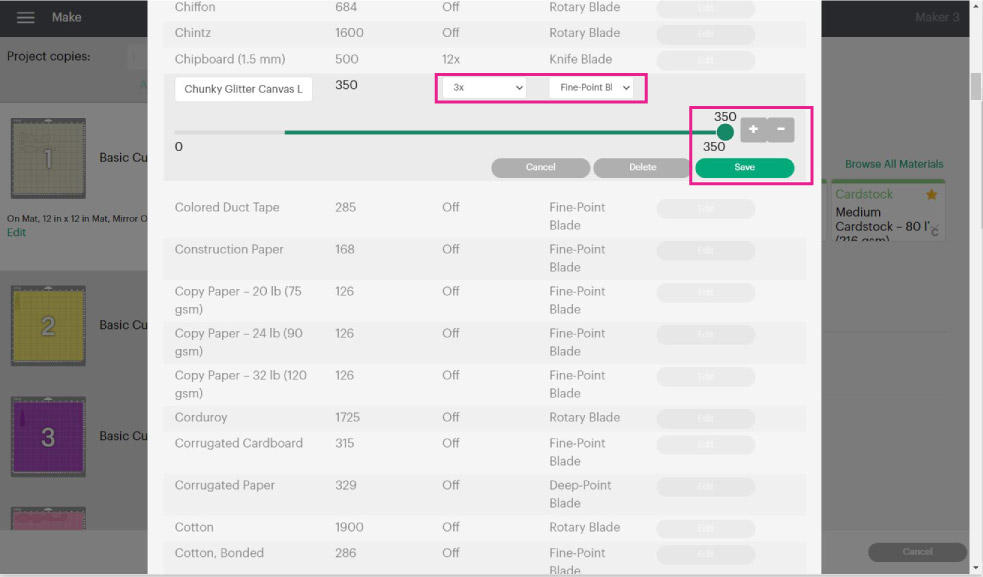
To create a new fabric type in the name in the "New Custom Textile" box and click on relieve.

Upon saving the new textile, you lot'll be able to edit it. For chunky glitter (less chunky) canvas, move the force per unit area to 350, 3x (number of passes), and select the fine point bract.
For a thick mesomorphic sheet sheet, y'all'll need the Deep bespeak blade, move the pressure to 350 and add six passes. Very thick chunky canvas sheets can be quite hard to cut. Before you commit yourself to a large projection, do a test cut.
Check out my guide on how I make test cuts with my Cricut Auto.


For faux leather, you need the fine indicate blade at 350 in pressure, and there's no need for extra passes.
If yous are using Cricut's faux leather, use the cardboard material in Design Space.
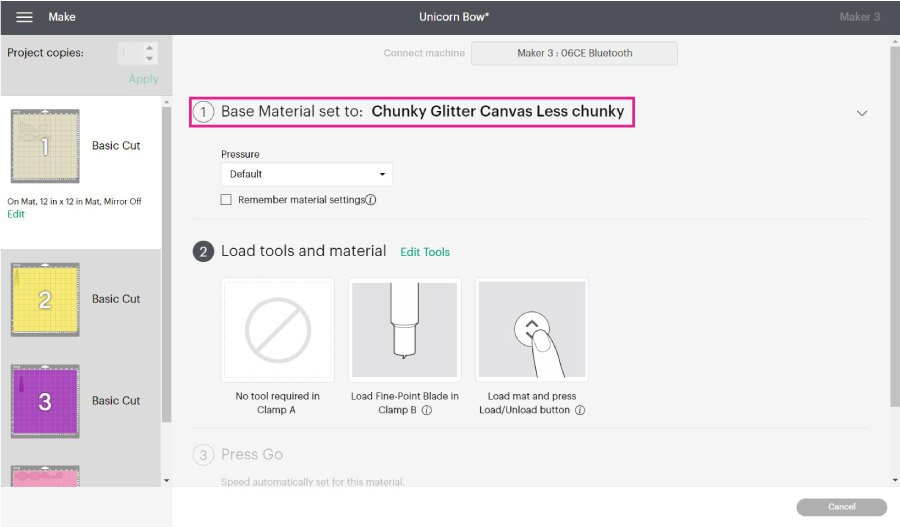
Afterward creating the new materials, close the window, go back to browse materials, and select the one yous need according to the mat you're on.
Sometimes, at that place are mesomorphic glitter canvas sheets that are a piddling scrap extra chunky, if that'southward the case motion the force per unit area to "more than."
Allow'south starting time with the cutting process!
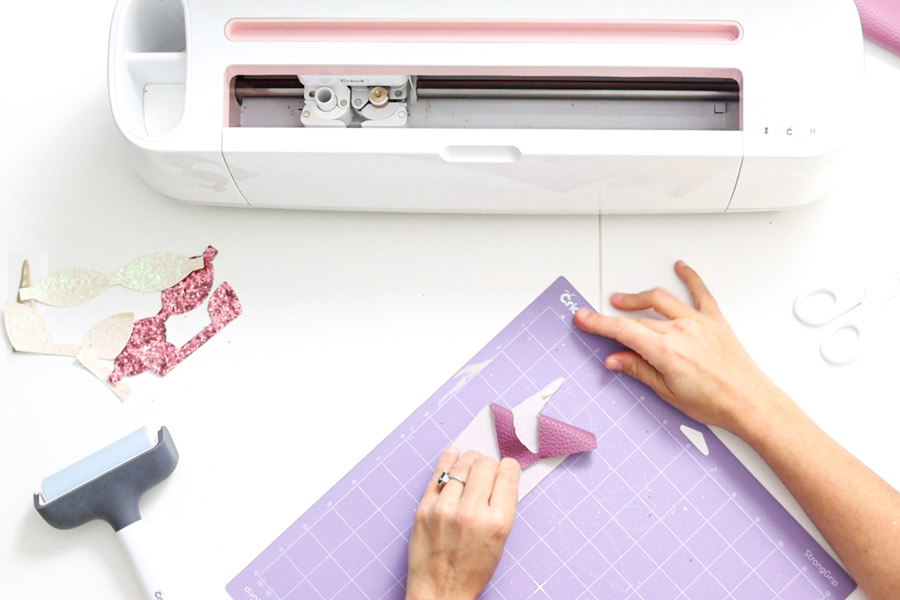
Cutting Bow with your Cricut
There are two mats where I am cutting Chunky Glitter Sail (Less Mesomorphic). And so I selected from Design Space.
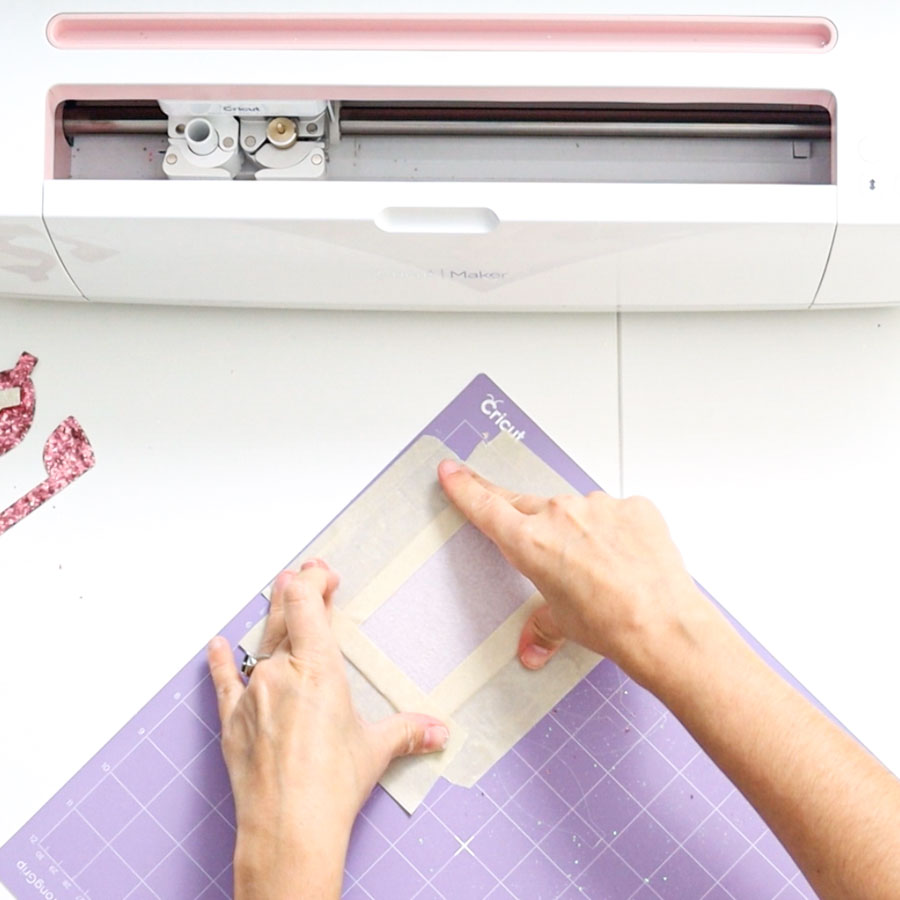
At present we are going to organize the material on the mat.
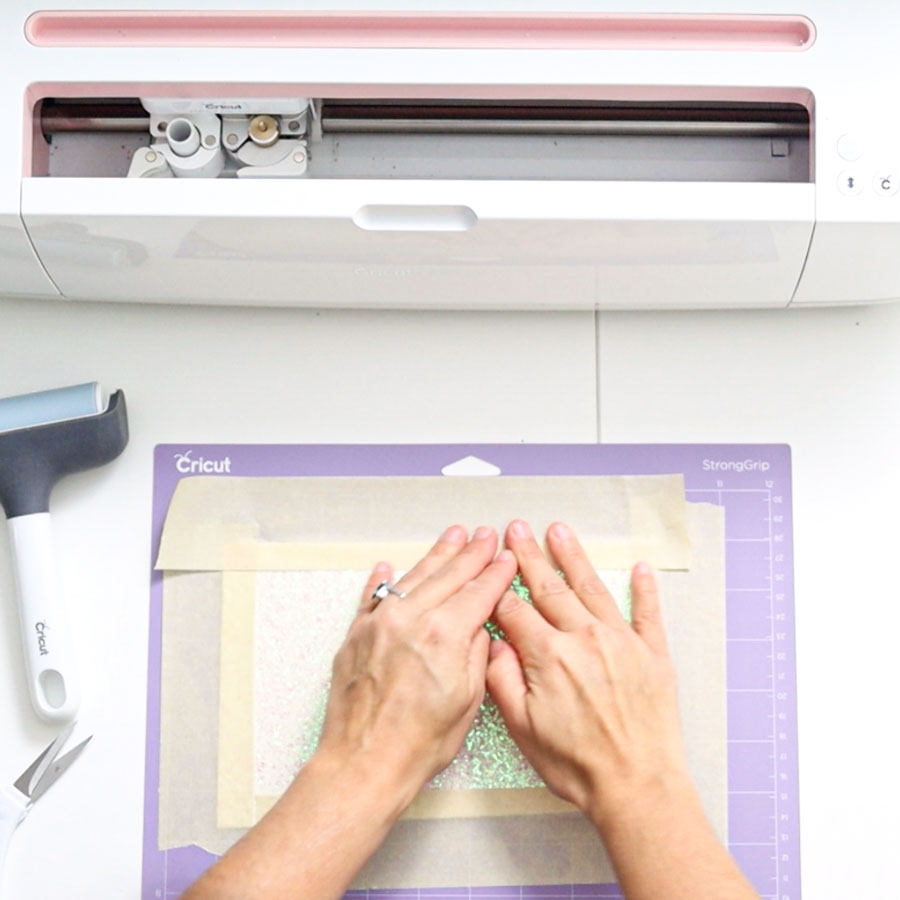
Remember, we move the material one from the left and the summit? Do the same thing on the mat.
It's important to mention that you need a lightly used or brand new mat when making bows out of chunky glitter sheet. Otherwise, the material can motion and go ruined.
IMPORTANT: Masking record needs to be abroad from the blade. Make certain to place information technology away from the cut. Otherwise, your bows won't cutting through.
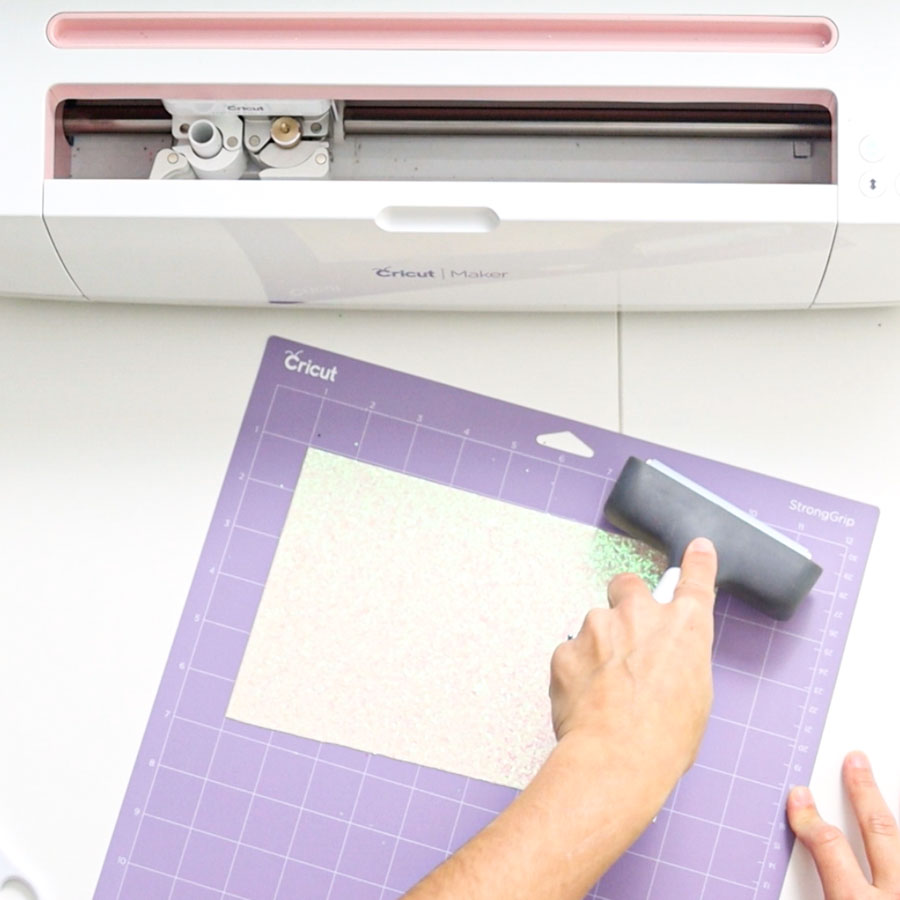
The brayer is likewise very important to stick the canvas sheet to the mat.
You don't demand tape for fine glitter sheets, only the chunkier the glitter is, y'all may want to add together masking record to add extra security to your project.
Masking tape volition be pretty handy if your mat is not that sticky.
I am sure y'all don't want to buy a mat for every bow you make.
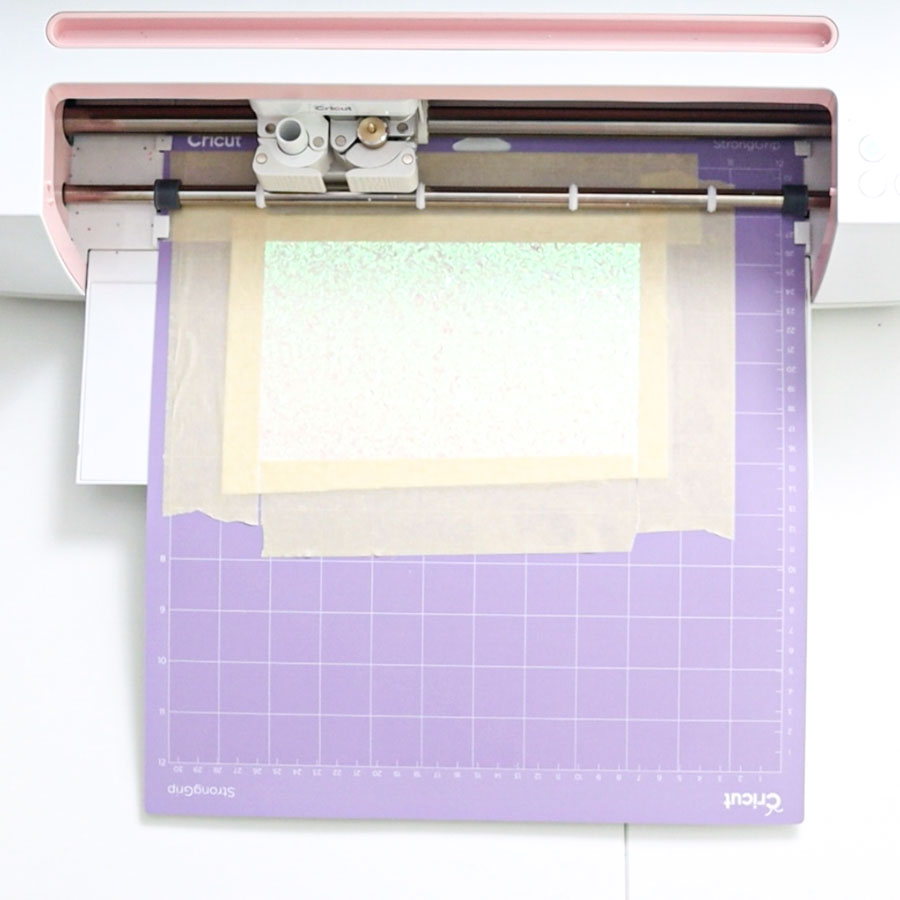
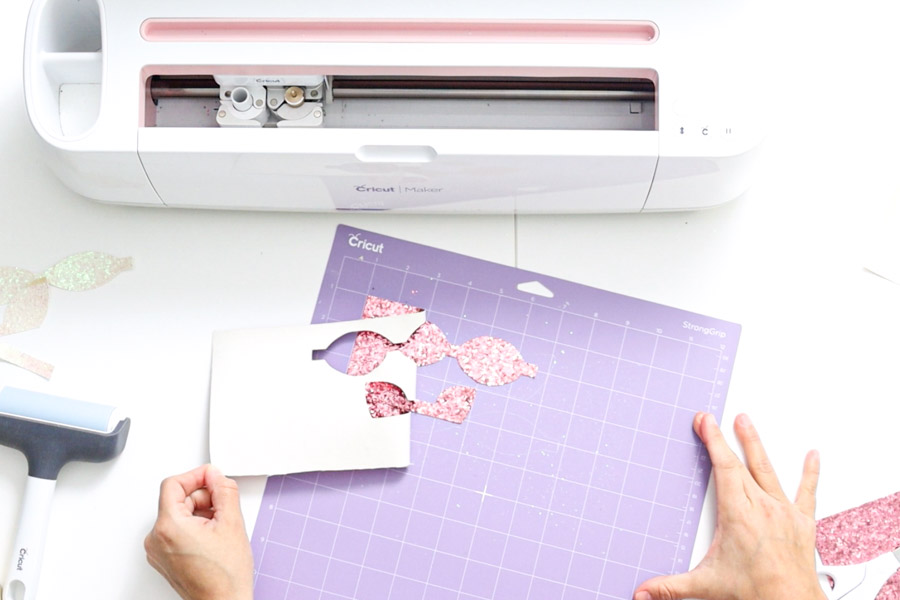
Once you lot're done arranging everything on the mat, feed it to your machine and tap on the flashing "Get" button.
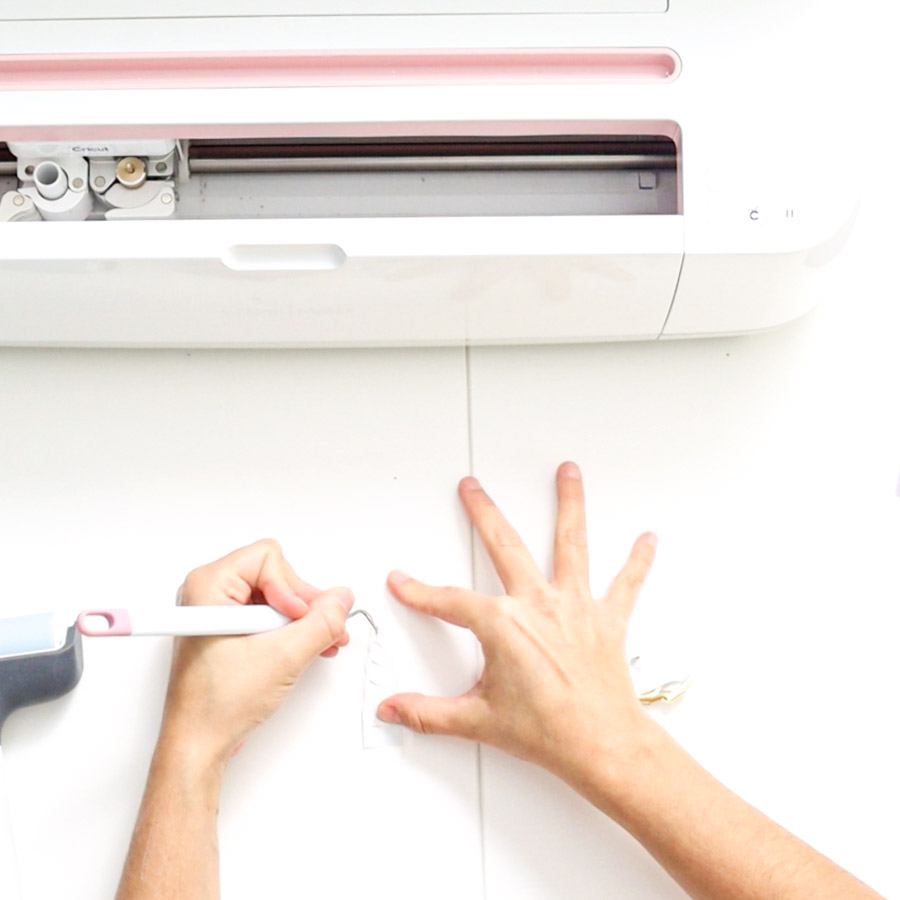
Unload mat, remove the tape, and cuts from the mat.
Here's the other mat using the same settings.
It's not that hard!
At present permit'due south cut Foil-Iron On.
Select the material in Cricut Pattern Infinite (check mirror is on).
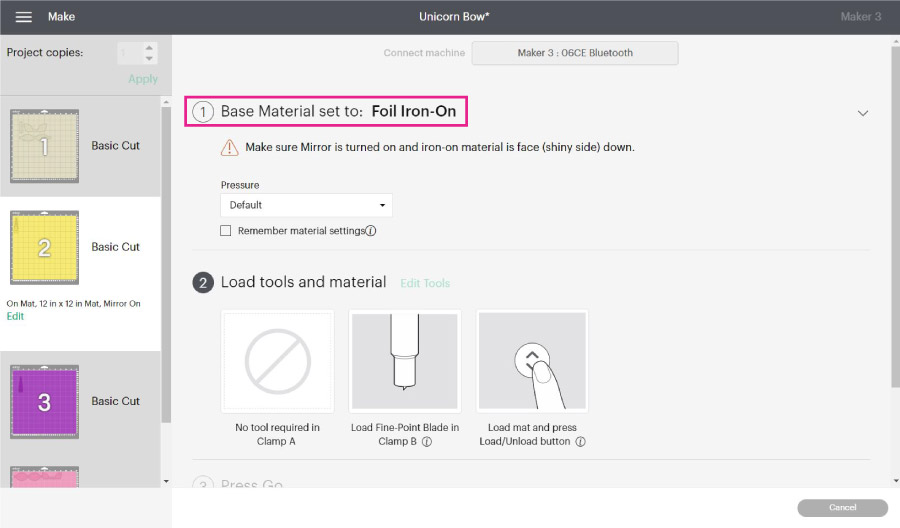
Place it on the mat "pretty side" down, so load, cut, and weed it!
This tutorial is not an Iron-On tutorial, so I won't go into detail on how to work with it. But if you are curious, you can bank check my"How to piece of work with Iron-On tutorial."
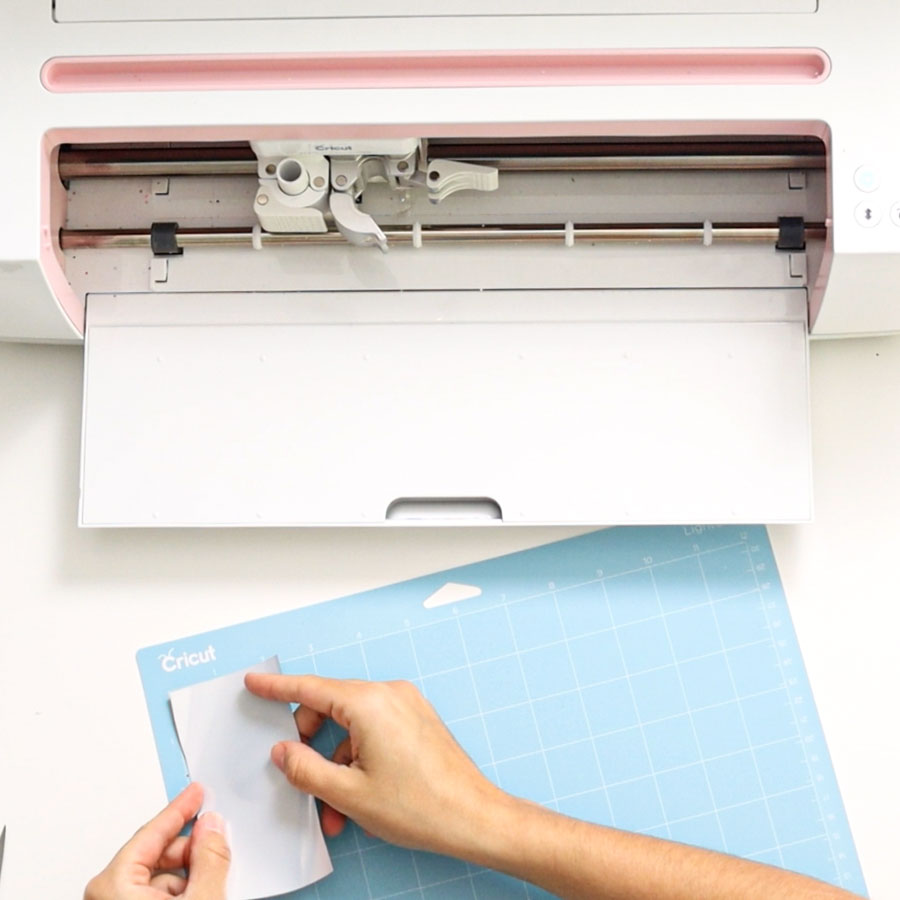
At present information technology'southward time to cut the faux leather!
Once you select the fabric in Blueprint Space, identify the faux leather pretty/pattern/color side downward (make sure mirror is on).
If your mat is very new, you don't need masking tape. If it's used, I recommend you use it.
Once more, avoid placing record where the blade will cutting through.

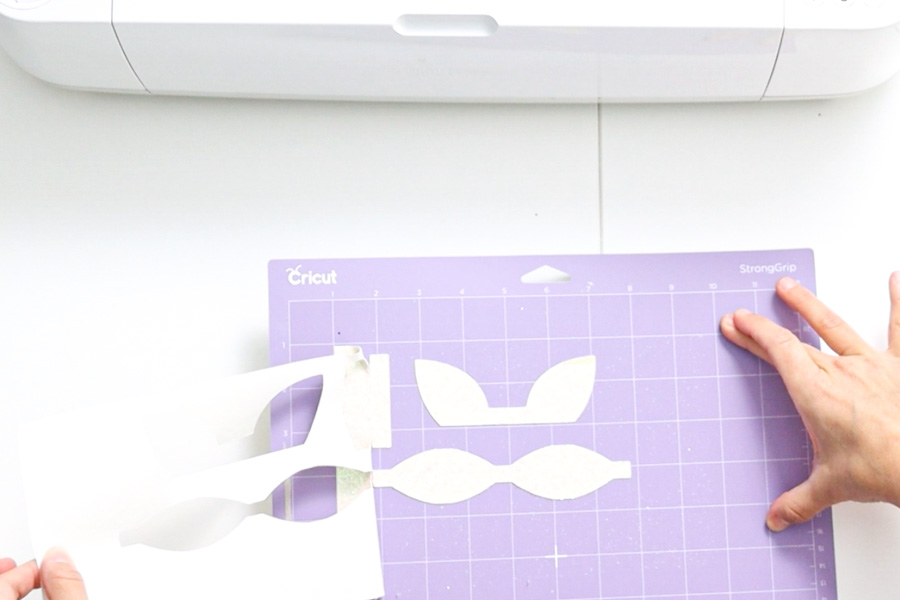
Load your mat to the motorcar, cut, and remove cut from the mat.
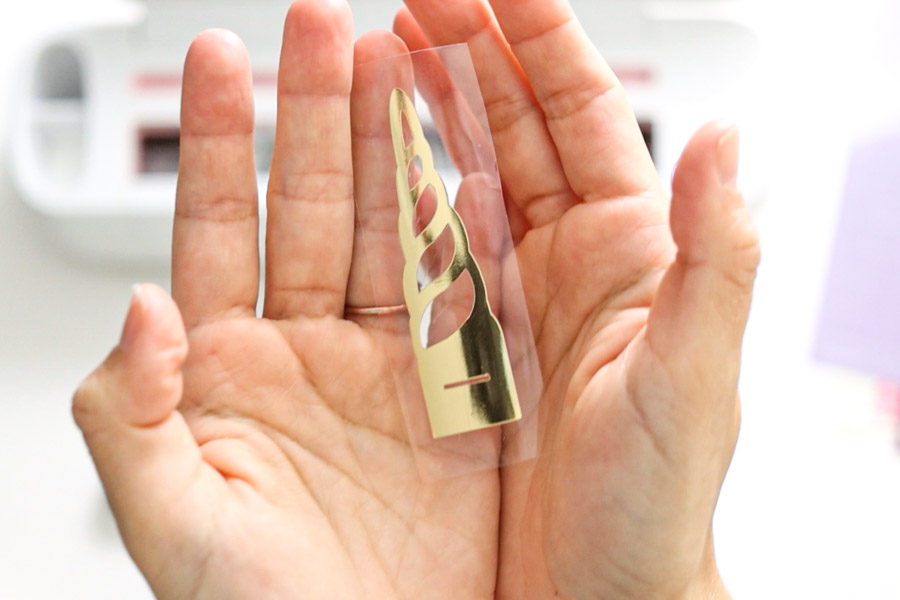
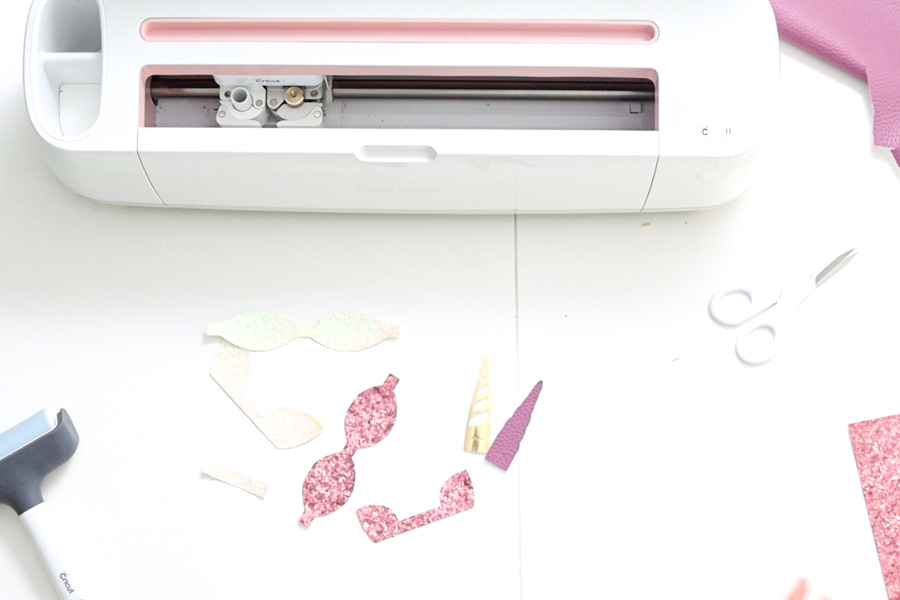
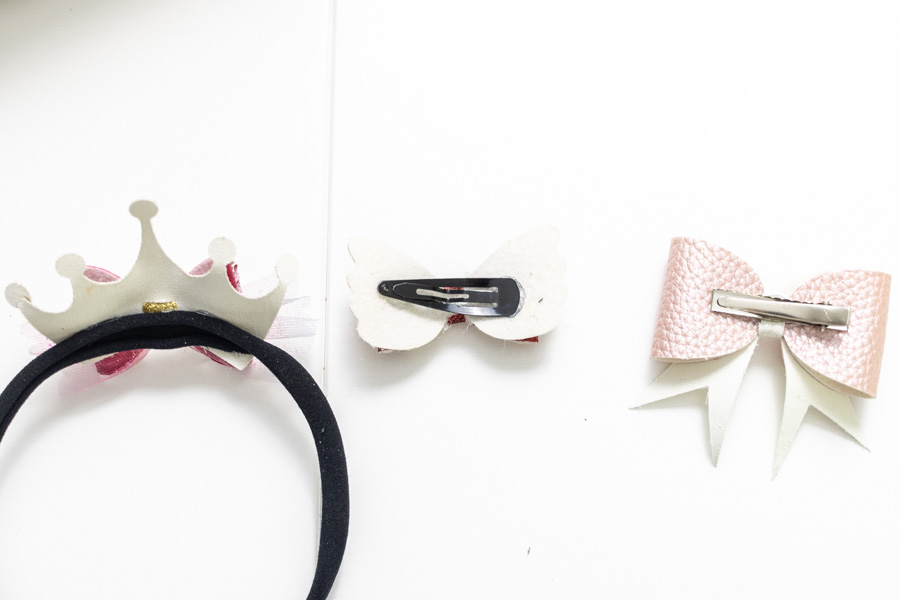
Here are all the pieces we cut.
Are you ready to put the bow together?
Gather Pilus Bows
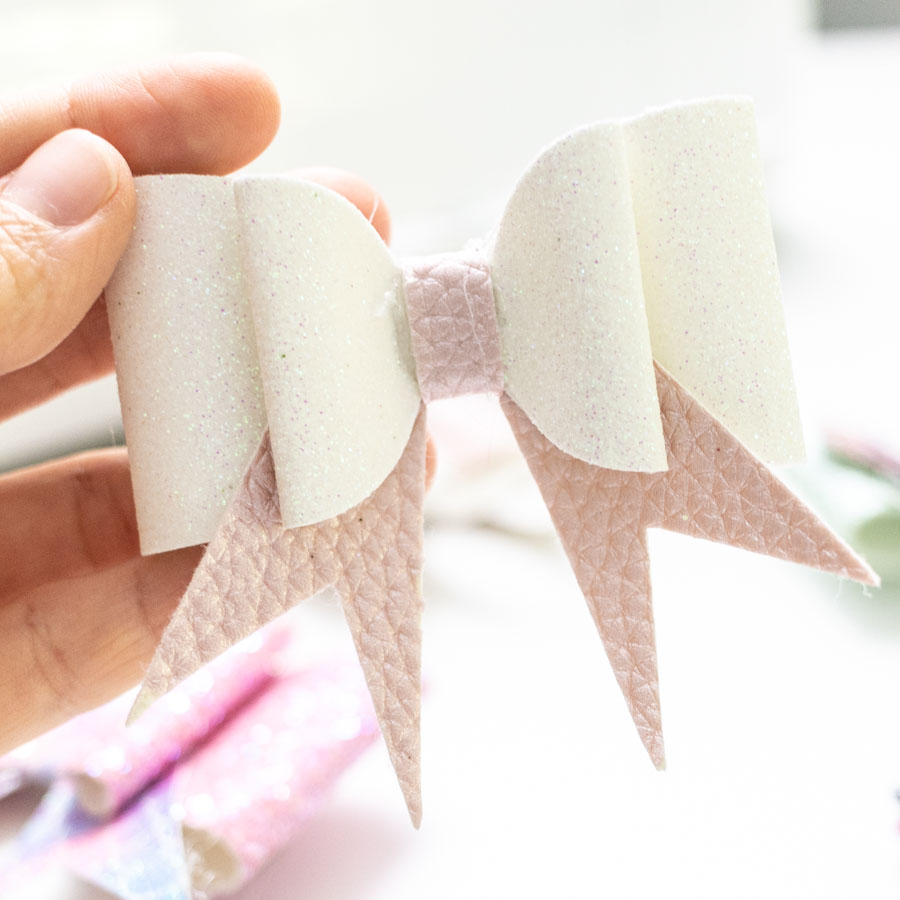
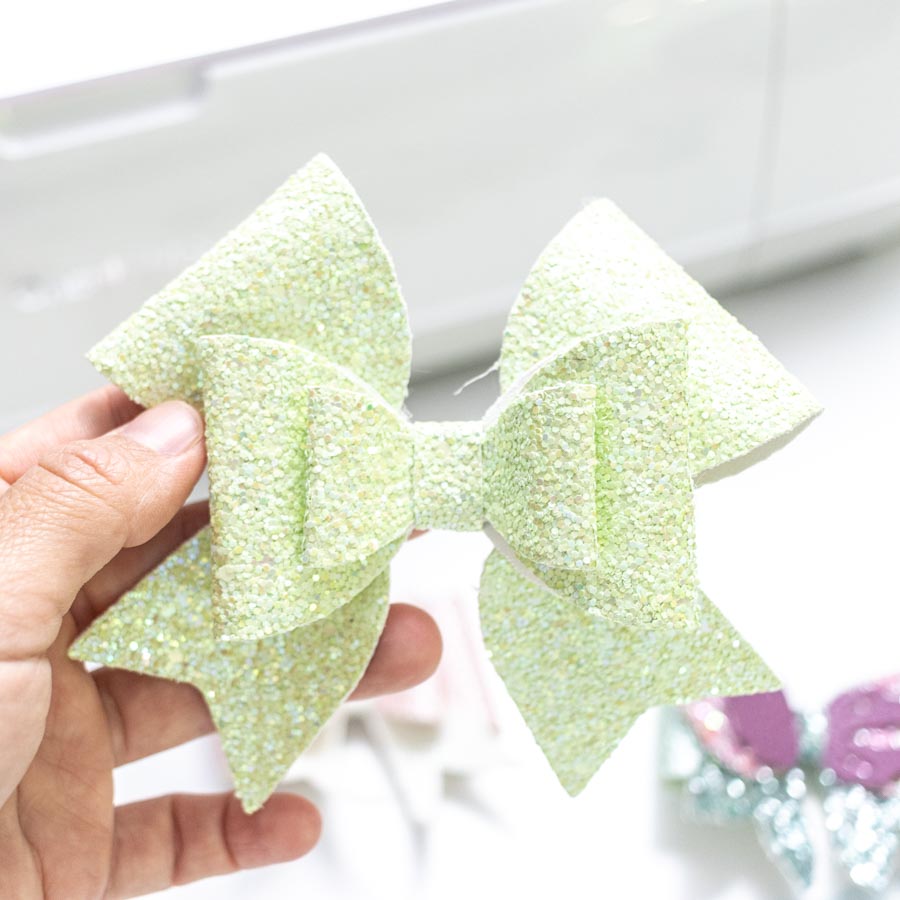
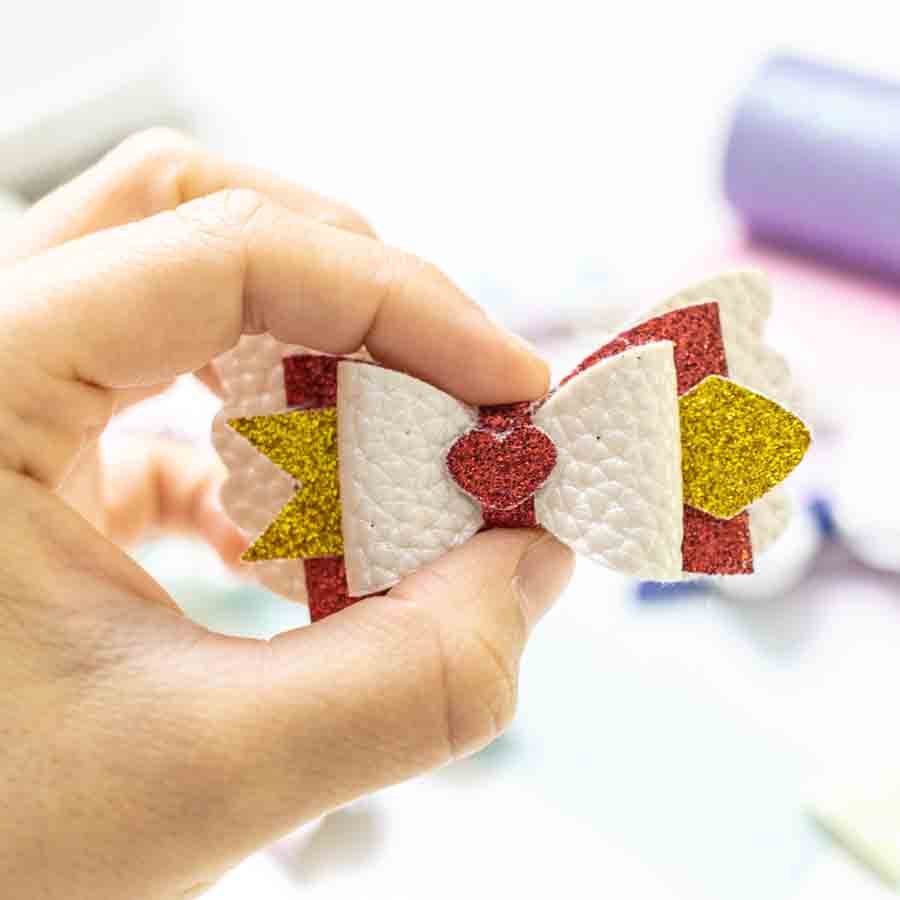
Assembling hair bows is the easiest role and most fun part. The only matter you lot need to consider is the order of each slice.
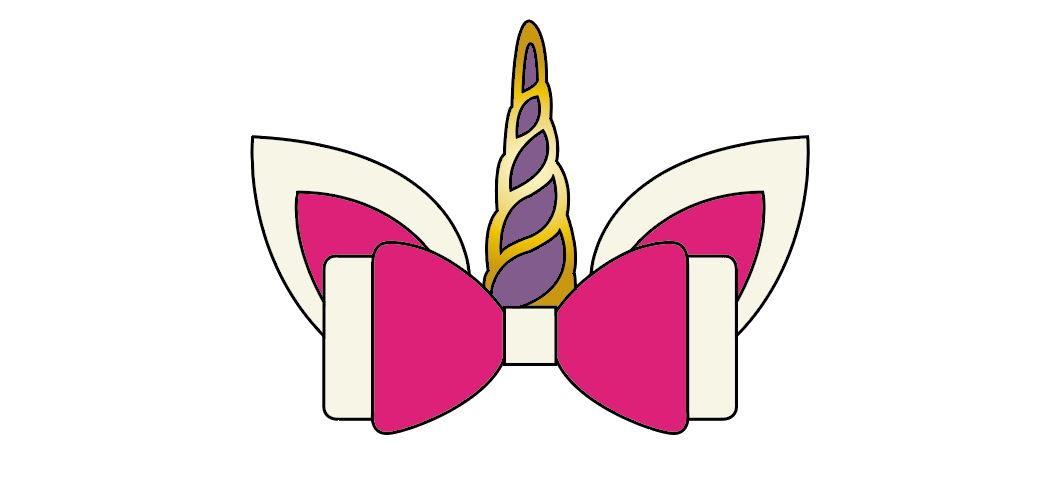
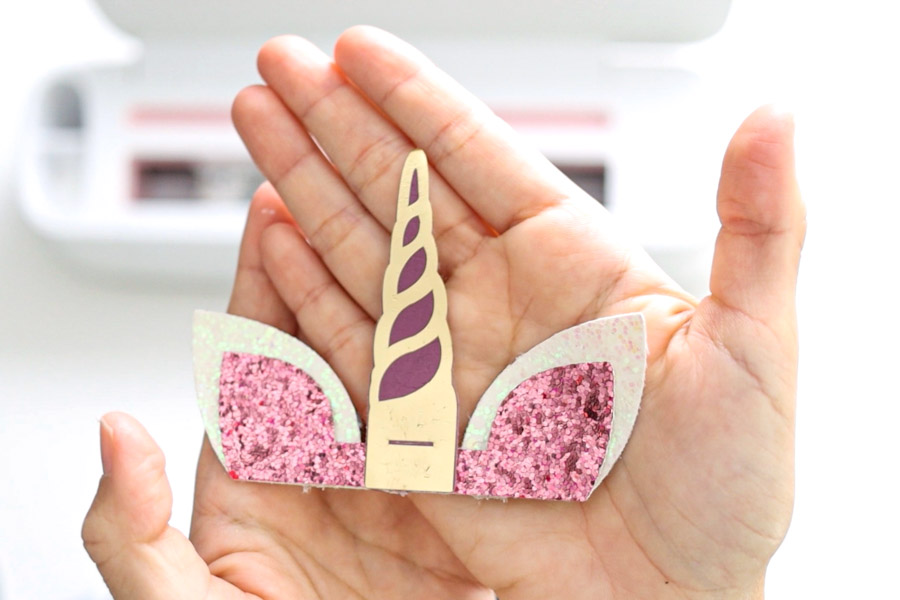
Here's a little preview of how the bow should expect like.
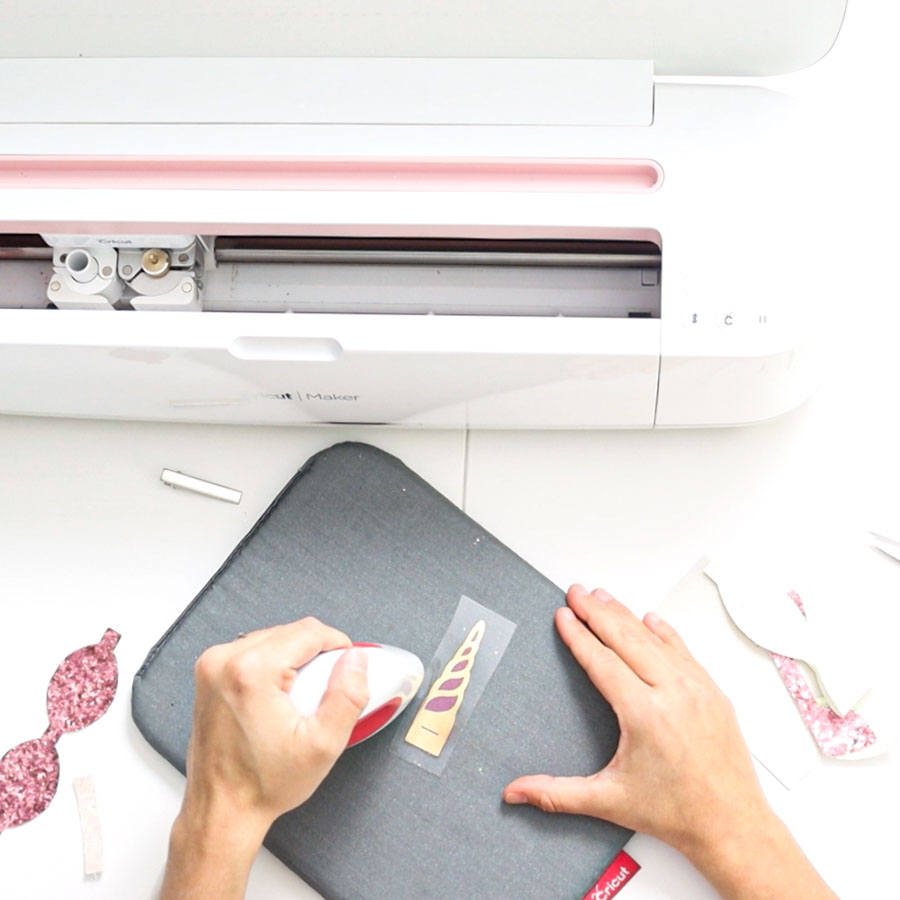
First, I transferred the foil iron-on to the horn. I used the Easypress Mini and followed Cricut's heat guide.
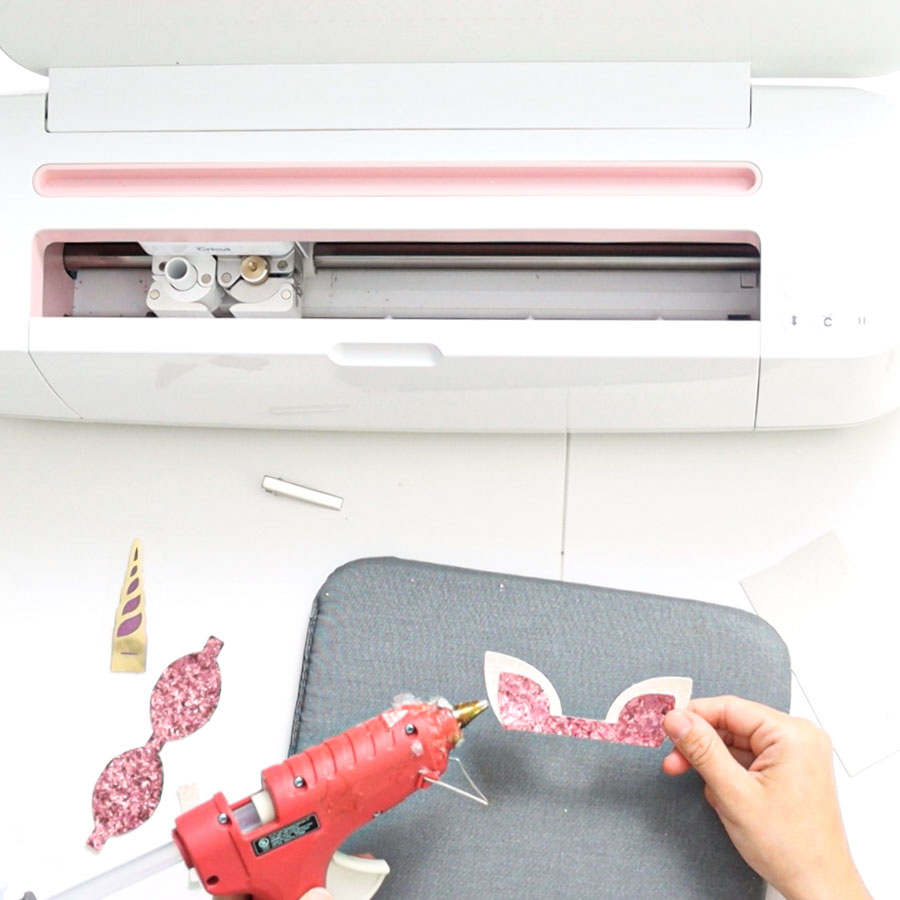
Secondly, I glued the inside ears with hot gum, then stuck the horn to the ears.
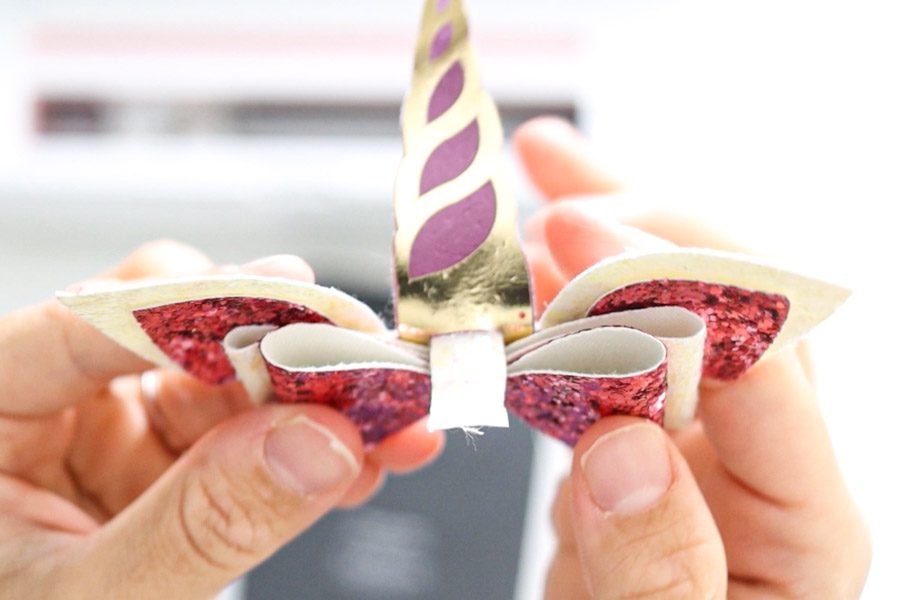
Necessary: Brand certain the little cut on the horn is non glued.
Information technology'south time to glue the bows!
Flip them and add together a little bit of hot glue in the center of them, and then advisedly close the bow.
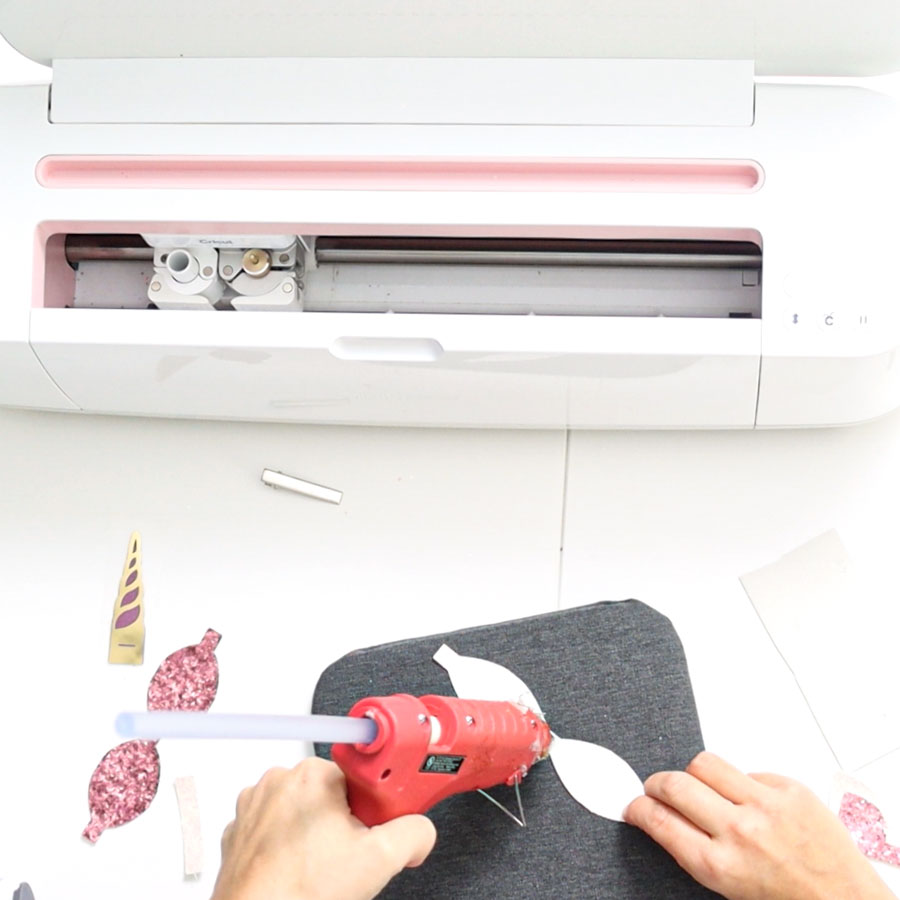
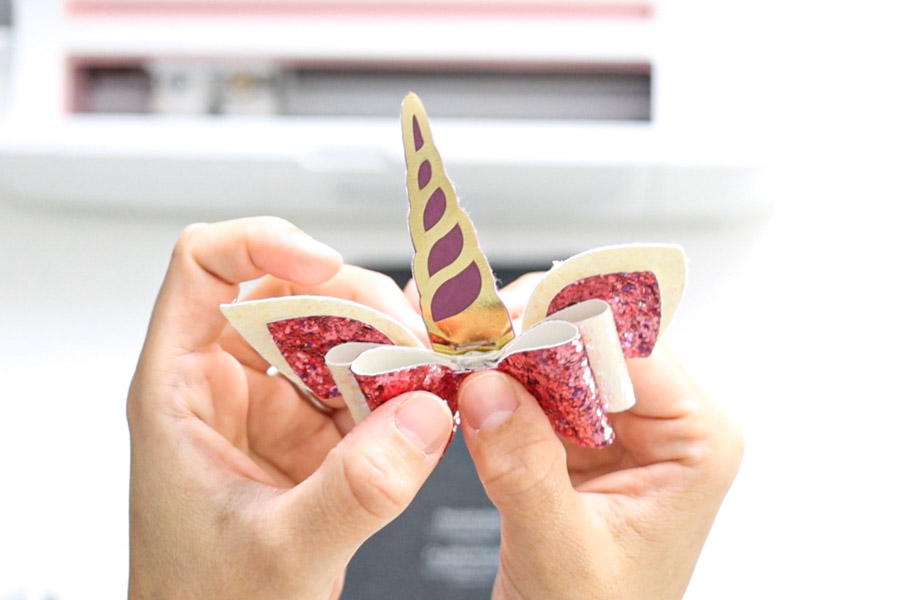
Now glue the long bow to the ears, and finally, glue the shorter bow. At all times, go on the small cut on the horn visible.
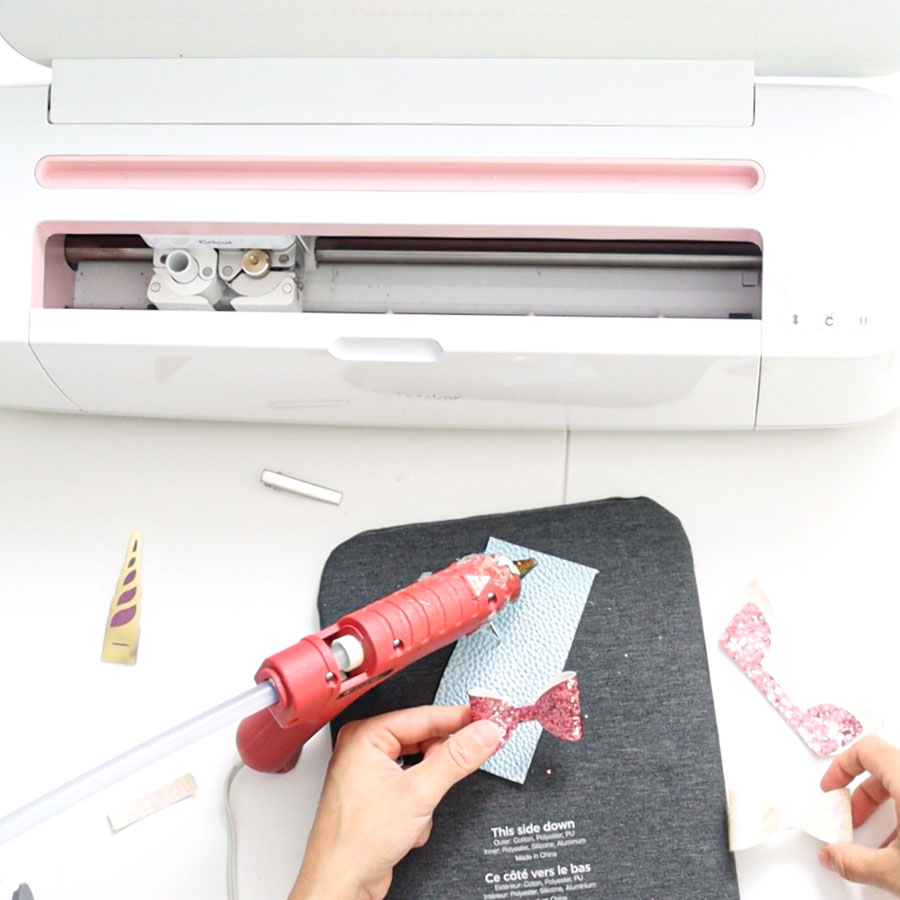
Insert the trivial rectangle through the horn cutting and glue it on the back to close the bow.
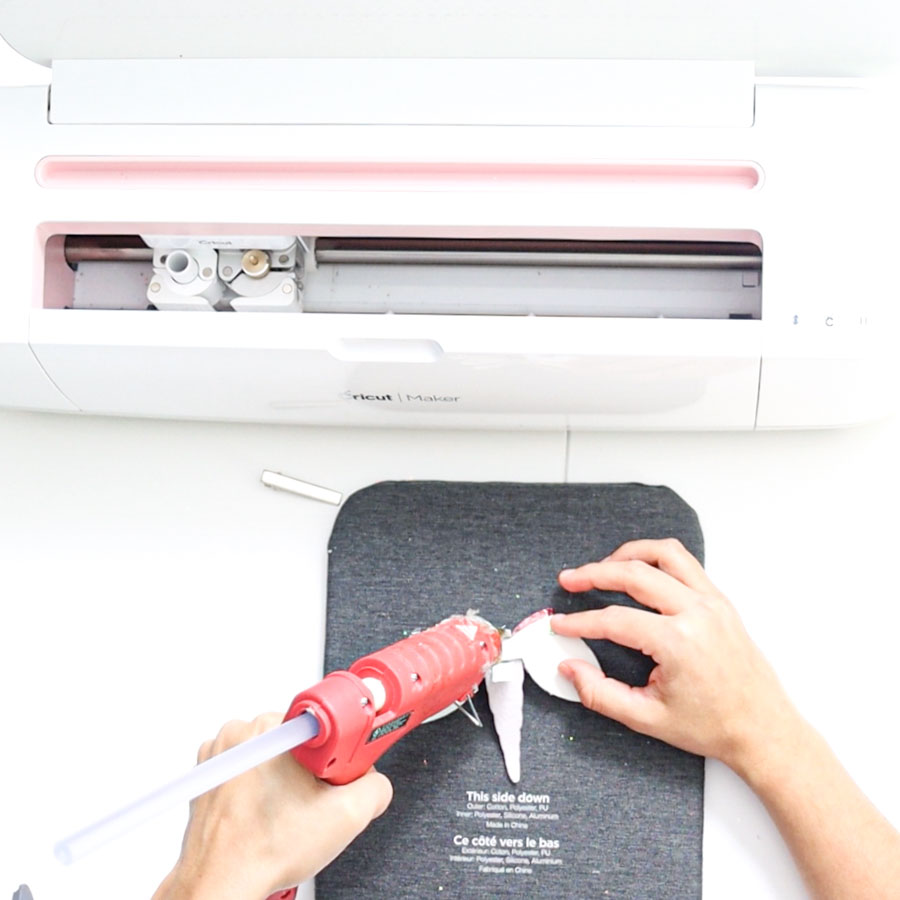
Finally, glue a hair clip to complete your bow.

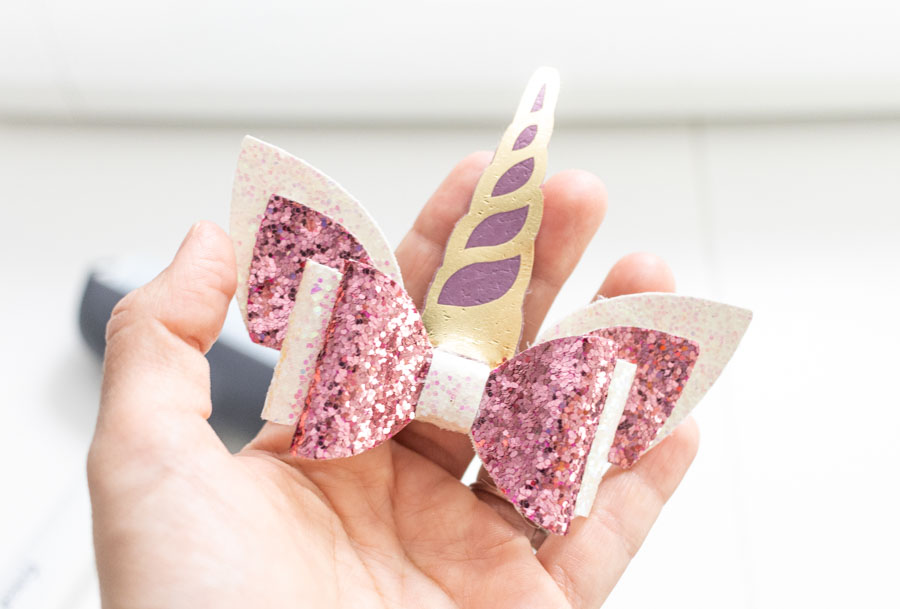
Doesn'tinformation technology look lovely?
Any girl would dearest to wear this cute petty bow.
Try using different types of hairbands, snap hair clips, etc.!
There'south no limit to creativity.
Free Pilus Bows SVG Templates
Here are 18 bows you tin utilize for your personal use! My slap-up assistant helped me with the designing procedure.
Isn't she so creative?
There'south ane for whatsoever occasion and flavor!
To download the files, yous NEED to be on a desktop or laptop, and yous must click on the button to trigger a download file on your pc.
Depending on your browser settings, sometimes your PC volition enquire where to save the file, although, most times, the files will be in your download folder.
If the image opens in a new window (this may happen because of your browser settings), correct-click on it, select the selection "Save Prototype As," and cull where you want to salve the file.
SVG files look like a web page file when you download them.
Oh!
And just so you know, I also have a library full of free SVG files and Printables for all of my subscribers, a.k.a Daydreamers. You can see a preview right hither or get access by filling out this class.
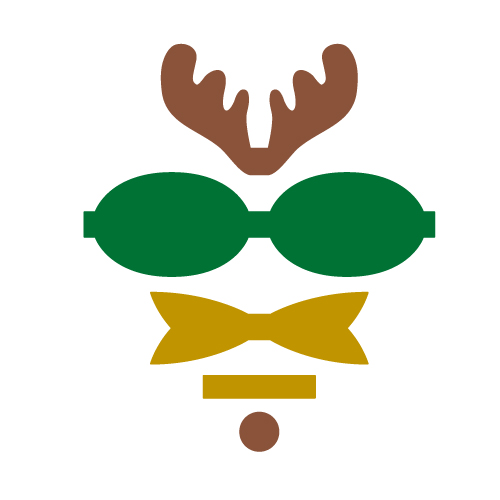


You can use the Reindeer one for Christmas.
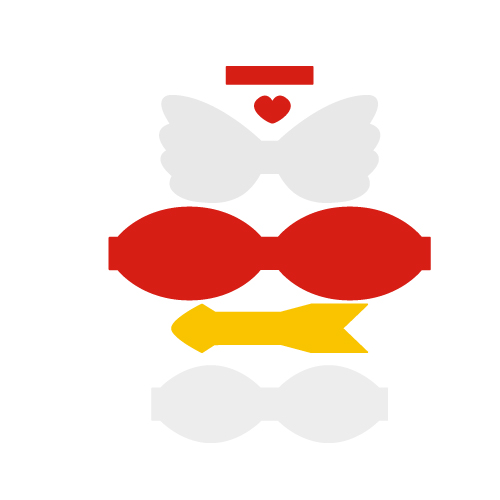
Of import:Princess and winter bow have a square meant to represent a very thin fabric like tulle.
If y'all have a Maker machine, you can use the rotary blade, and if you have the Explore, y'all volition demand to apply a heat-and-bond canvas and pink blade (or fine indicate blade defended to fabrics simply).
Here'south a little graphic with the guild of each bow in case yous take whatever doubts nearly how to assemble them.
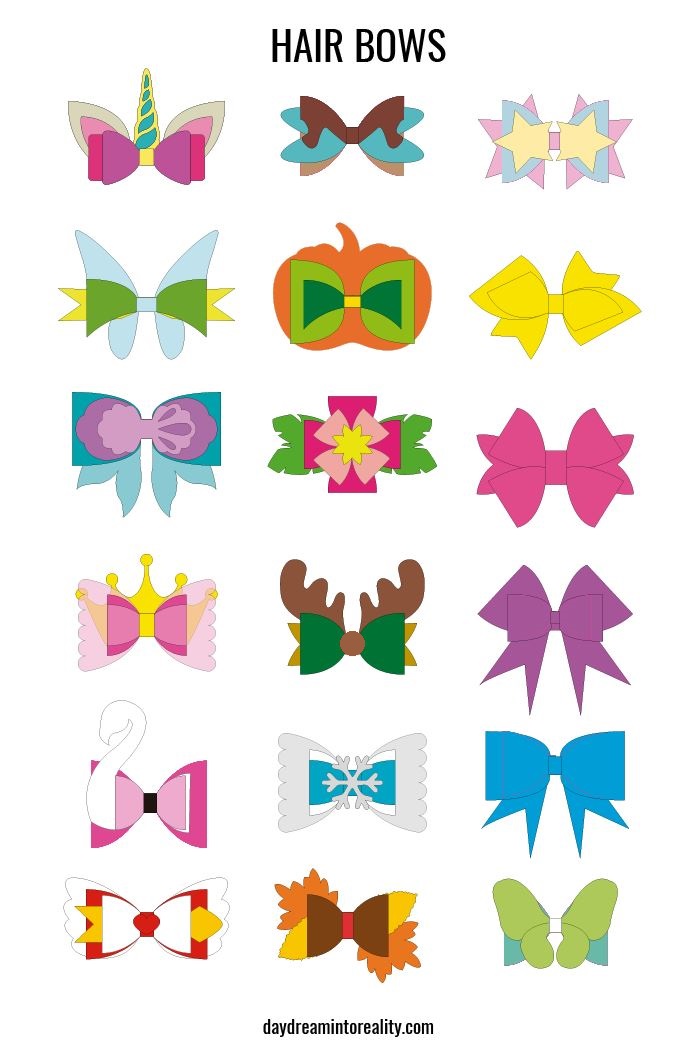
Which one is your favorite?
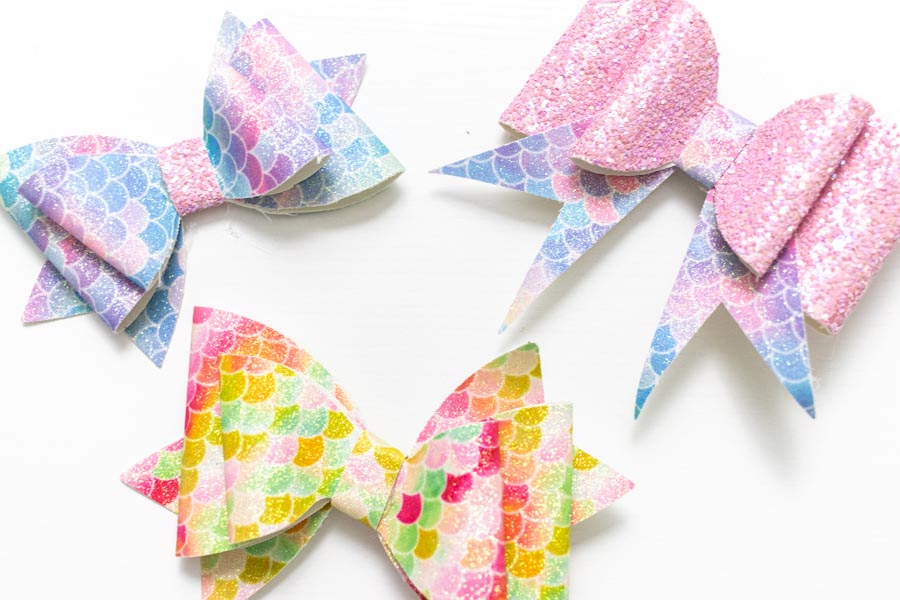
Await how some of these bows look one time cut and assembled.
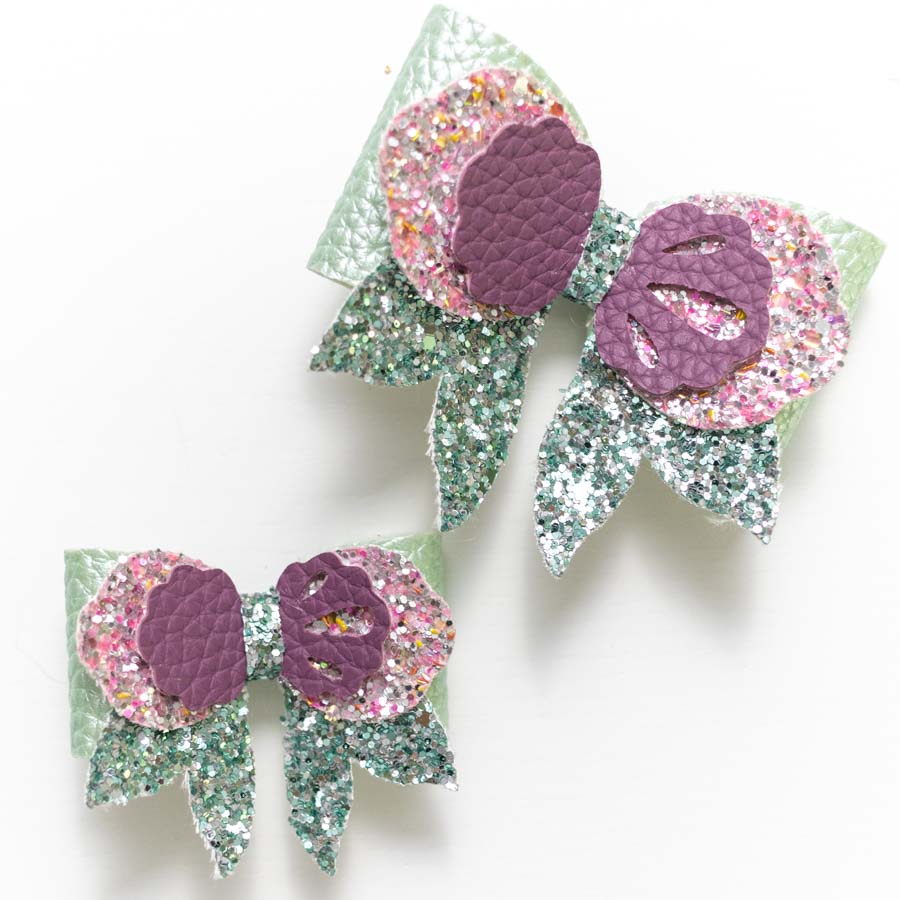
For the mermaid bow, I used super mesomorphic glitter canvas. Tin can you see the texture in the photo? Those sheets have small pieces of colorful plastic or something thick I can't quite tell.
Also, I would never employ glitter sail for the purple piece in the mermaid hair bow; the cutting is very intricate.
-

-
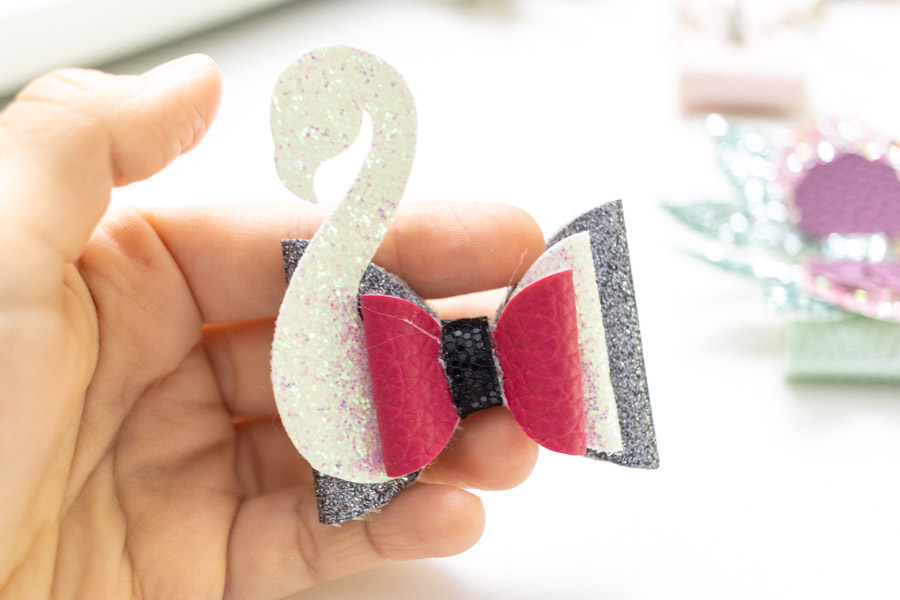
Swan Pilus Bow -
Using Mermaid Glitter Sail
With mermaid scales glitter canvass, yous tin can give any bow a magical mermaid touch on.
Play with different textures and colors!
-
-
-
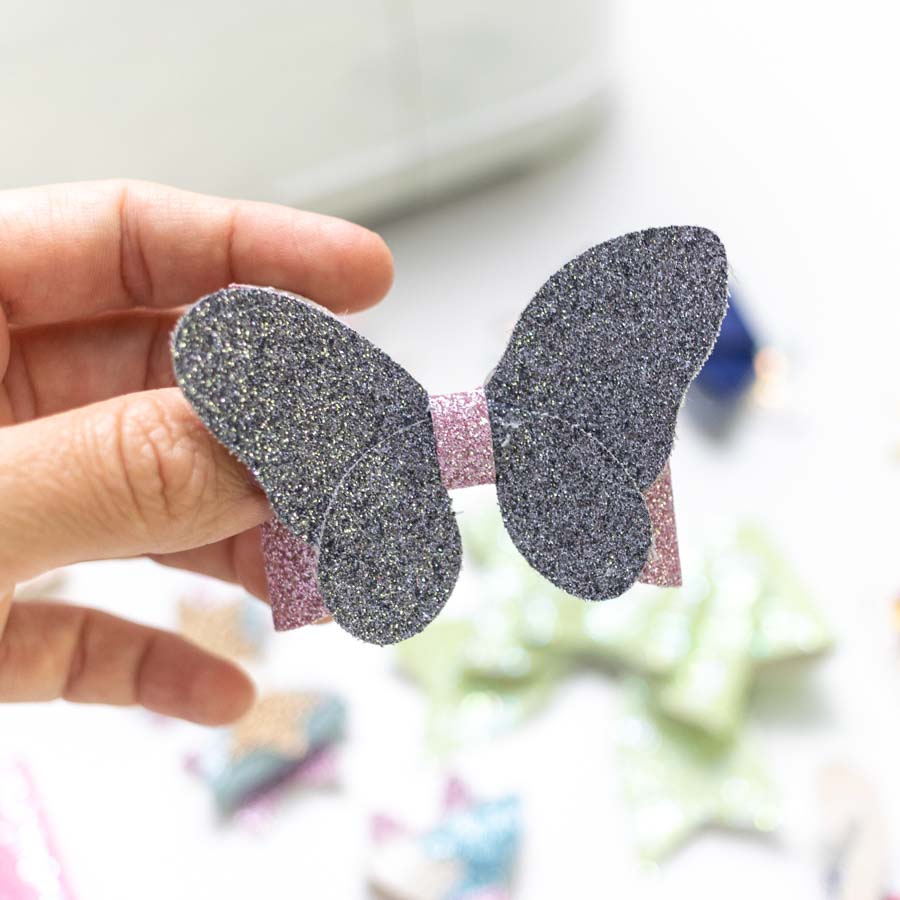
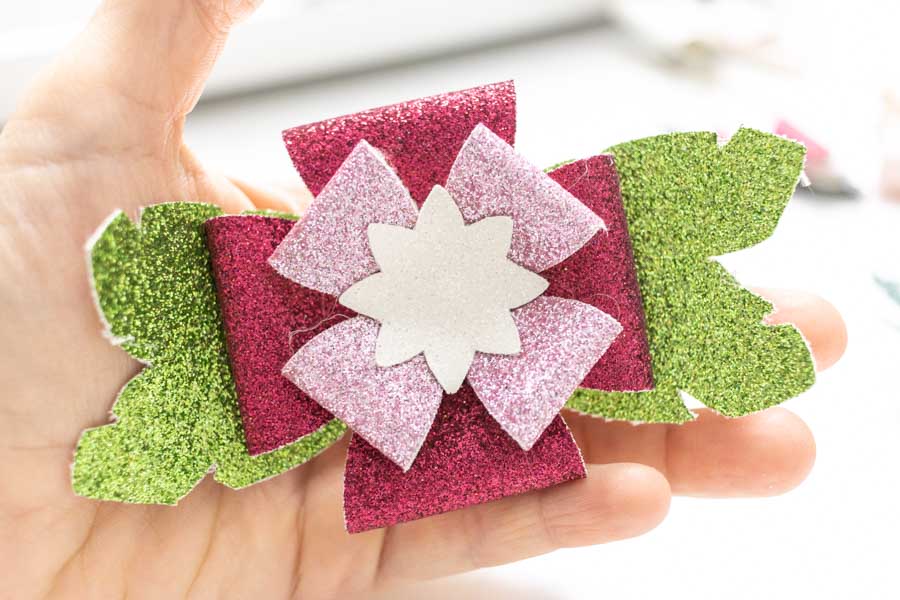
Fairy Hair Bow
If you look carefully at the winter and princess bow, y'all volition see the tulle.
It's then classy and unlike.
-
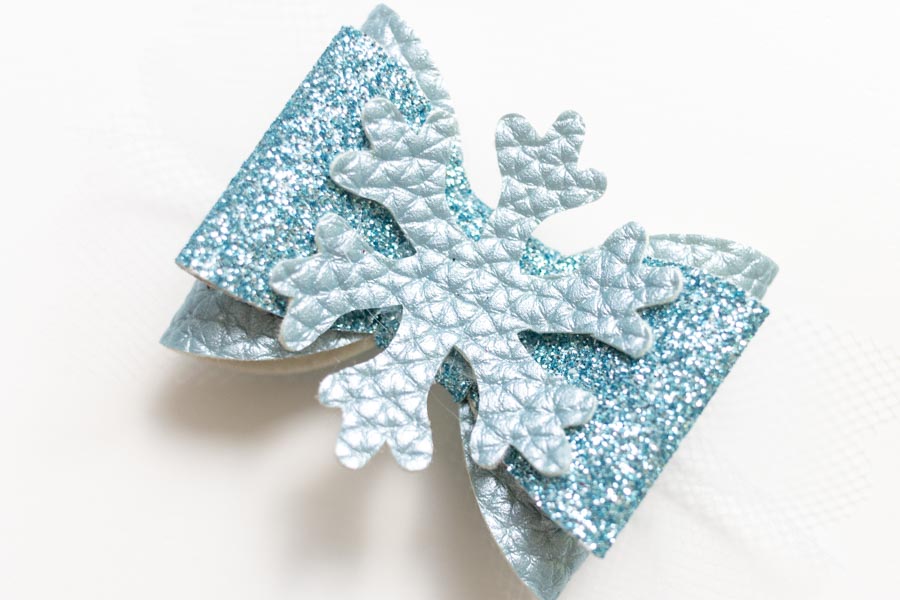
Wintertime Pilus Bow -
Cupid Hair Bow -
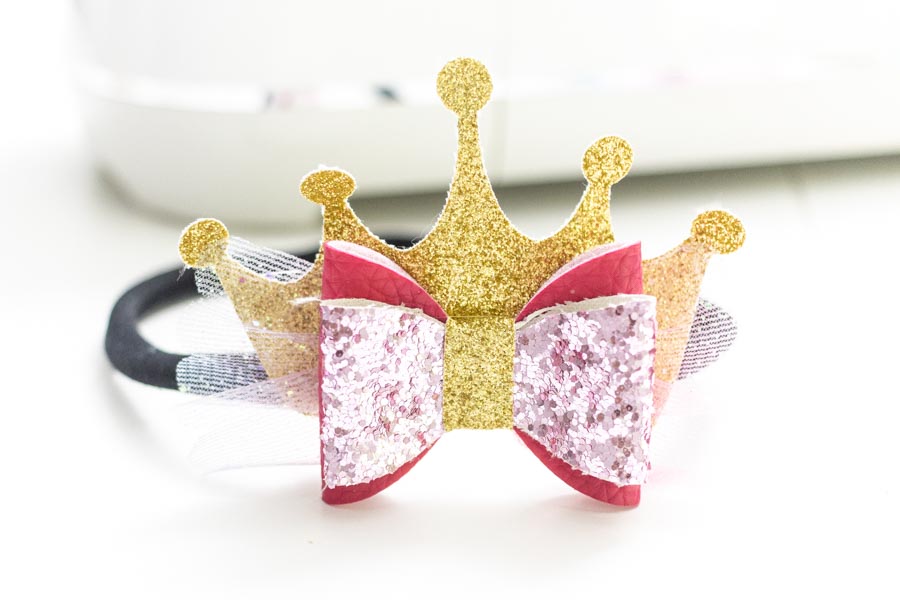
Princess Hairband
If y'all brand whatever of these bows, brand sure to tag me on Instagram. And I would as well appreciate a follow!
Don't forget to pin this tutorial.
I'll encounter you in my next article.

How To Make Hair Bow Templates,
Source: https://www.daydreamintoreality.com/cricut-hair-bows/
Posted by: torresthereenewhe.blogspot.com
0 Response to "How To Make Hair Bow Templates"
Post a Comment